Pages

Wednesday, 23 March 2016

Chow Mein/ Veg Hakka Noodles

In the 80's, back in India, growing up I remember Chinese food as one of the most sought after fast food (pizzas and burgers had just about started to get popular but were a little too expensive to relish on a regular basis) amongst all age groups. Food vans parked in the corner of your neighborhood market  were a common sight alluring the customers with lipsmacking chinese food- chow mein, sweet and sour chicken, chicken manchurian amongst many other delicacies.To add to the delicious waft of aromas and the sizzling sounds coming from the van, was the visual theatrics of the person cooking the noodles, tossing them up high in the huge woks succeeding in breaking down all your resolves of resisting the delicious fare. Who in the right mind could resist it, not a foodie like me.  
Apparently that Chinese food served India, has not even a remote resemblance to traditional Chinese cuisine. As the history goes, in the early 20th century, the Chinese settlers came to India and settled in different cities. This communion between the Indian and Chinese people gave birth to, amongst other things ;)  the Indo-Chinese cuisine where Indian spices were added to suit the Indian tastes. This is what gave birth to dishes like the sweet corn soup, veg and chicken sweet and sour, Chilli chicken, Gobi manchurian. 
But now it has become so popular in India that one can get it in any restaurant in India and at the same time can also be found very commonly on the roadside street fast food joints.
Having moved here to U.S a year and a halfback, I have been craving and desperately missing our desi Chinese food. We tried a lot of restaurants but it just wasn't the same. In the end I just decided to recreate the same flavors at home, something that can be enjoyed by everyone in the family.
Seriously, nothing compares to the flavors from back home. I think this is what cherishing and holding onto sweet memories is.....that makes you long for your home, your friends and family left behind!!

prep time:15 minutes
cook time:15 minutes
serves: 3-4

Egg noodles- 400 gms or 2 packets 200 gms each
Salt to taste
Oil- 2 Tbsp
Sesame oil- 1 Tbsp.
Garlic- 1 tsp chopped 
Onion -1 medium, sliced thinly
Cabbage- 2 cups, finely sliced 
Carrots - 2, finely cut into thin strips (julienne)
Green pepper -1, sliced thinly
Bean sprouts- 1/2 cup
Chives- 6 sprig, finely chopped
Soy sauce- 2 tbsp
Vinegar- 1 tsp 
  1. Boil  the noodles in plenty of water till almost 3/4th cooked. Be careful not to overcook.
  2. When they are done, strain the noodles in a colander and run them under cold water. Toss them with 1 Tbsp. of oil and keep aside.
  3. Heat oil in a wok on high heat.
  4. Add the garlic and cook for 30 seconds.
  5. Add the onion, carrots and green pepper and cook for 1-2 minutes on high heat or till the carrots start to get a little soft.
  6. Now add in the cabbage and toss again for 30 seconds.
  7. Add the noodles to the vegetables.
  8. Add  in 1 Tbsp. sesame oil.
  9. Add salt, pepper, vinegar and soy sauce and toss to mix thoroughly.
  10. Add in the beansprouts and toss again.
  11. Serve hot.

My recipe of Veg Hakka Noodles was also published in the Urban Spice. 

Tuesday, 22 March 2016

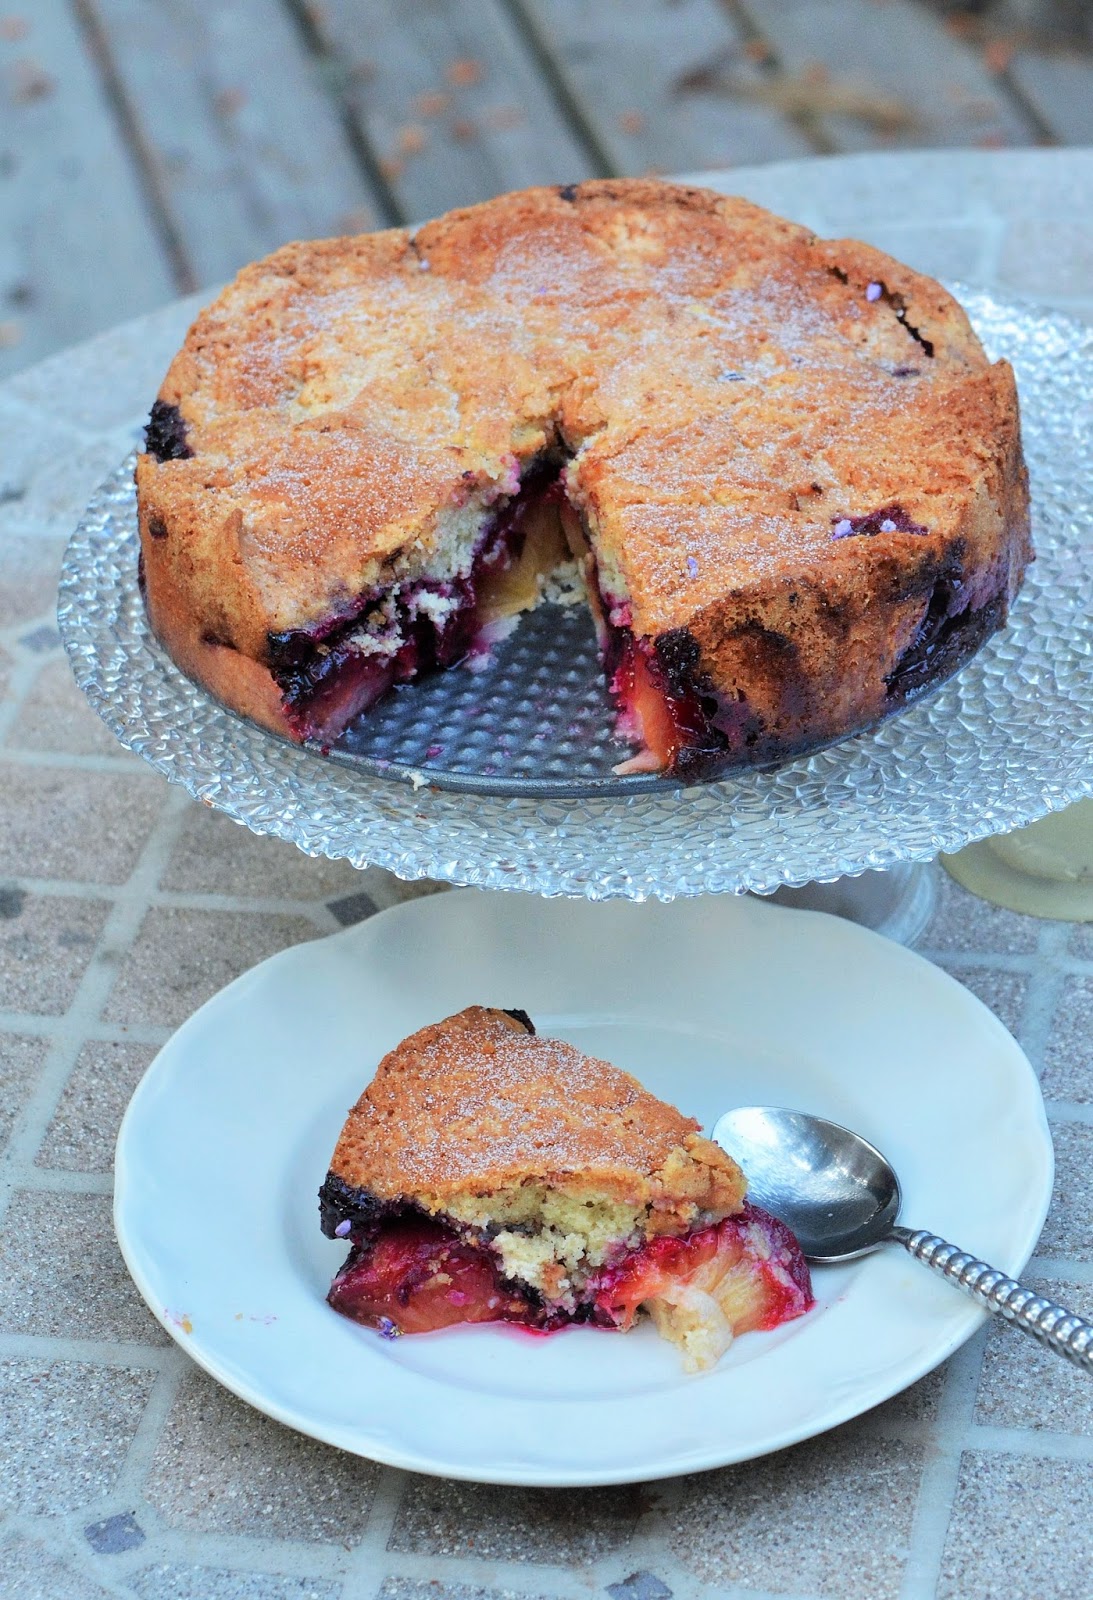
Marion Burros's Classic Plum torte

This torte is a legend in itself. First published in the New York Times by Marian Burros in 1983, the recipe was so popular that it was published every year during plum season for nearly two decades. years. The following year when the readers were informed that they would no longer be publishing the recipe and they save their clippings of the recipe there was a big uproar. Understandably!! Make this recipe and you will know exactly why!!
This recipe is a definite keeper and the best part with just a handful of ingredients it is so so simple to make. Though it is just a straightforward batter of flour, butter, sugar, eggs and the divine sweet and sour plums, it is perfect in every aspect.
The end result is a light buttery cake with fresh plums inside which when baked release their juices inside and become all soft and gooey make it incredibly moist and irresistibly delicious combination of sweetness and tanginess all in one bite!!
To make sure the recipe wasn't just a one time fluke I tried it out again (pic below) some time later following the recipe to the 'T' and I wasn't surprised that it turned out as wonderful as it had the first time. 
If you can resist, though I know it would be very hard to, wait a day before you eat the torte. Upon resting, the plums release their juices and merge with the cake around it - kind of like a cake with its own sauce. And when you thought it couldn't get any better - here is another great thing about this decadent dessert - it freezes beautifully!! So you can do a couple of batches when the plums are in season and pop them in your freezer to enjoy later on. To freeze, double wrap the tortes in foil, place in a plastic bag and seal.
Try it out and I am sure you will fall in love with this delicious dessert just like I have!!

Recipe adapted from The New York Times
Serves 8
Prep time:10 min           Cook time:50 min

3/4 cup sugar
1/2 cup unsalted butter 
1 cup unbleached flour, sifted
1 tsp baking powder
pinch of salt
24 halves pitted purple plums 
2 eggs
1 tsp cinnamon 
sugar and lemon juice for sprinkling on top
Heat oven to 350 F.
Cream the butter and sugar together in a large bowl.
Slowly add the flour, baking powder,salt and eggs and beat well.
Add the eggs one at a time and beat well till combined.
Pour the batter into a 8, 9 or 10 inch springform pan, smoothing the top with a spatula.
Place the plums skin side up atop the batter, nearly covering it.
Sprinkle lightly with sugar and lemon juice, depending on the sweetness of the fruit.
Sprinkle with cinnamon on top.
Bake for approximately 45-50 minutes until a toothpick inserted in the center comes out clean.
Remove and cool: Refrigerate for a day if possible if you plan to serve it the next day. Otherwise just dig in and enjoy it lukewarm!!
To serve a torte that was frozen, defrost and reheat it briefly at 300 degrees.

Tuesday, 1 March 2016

Involtini de Melanzane: Baked Eggplant Rolls

I admit my son is a fussy eater and I can do absolutely nothing about it!!
Deep in my heart, somewhere I feel hugely responsible that maybe I haven't done my duty as a mom, being really busy with my work when he was a small child, in introducing healthy eating habits or rather enforcing them. Seriously, put a plate of veggies in front of him and he shrinks away from it as if it is diseased. 
When he was younger, he was fixated on eating only these two vegetables - cauliflower and beans (sadly now he has renounced these too). So for years and years, that is what my maid used to prepare for him in lunch, alternating between the two for a change of flavor. Though, thankfully he loved his fruits, giving me a feeling of false assurance that somehow atleast in some way he is getting his nutrients.
I remember when he was just 7, sending my kids off for a summer camp for a week. When they came back my daughter told me that the young fella did not touch the vegetables and had only Roti (Indian flat bread) for the entire week, headstrong and obstinate that he was!!
And then there was my little daughter, who was an adorable angel as a child and never made a fuss about anything (ofcourse life changes and kids change when they reach their teens!!). To make sure that she didn't suffer the onslaught of cauliflower and beans, a separate dish was made for her as she was one who loved to explore new flavors and taste. Hats off to my good old maid that she did not give up and run away.
The fuss was only about vegetables, but give him a plate of chicken any day and he was quite happy with it. And yes, not to forget mashed potatoes with loads of butter and cheese in it. So over time, I have had my mind frazzled thinking of and devising ways in which I could feed him vegetables hidden in any form so that he doesn't recognize it and eats it happily. I know these are rantings of a frustrated mom so please go ahead and ignore me!!
I guess, I would not be the only one complaining about my kids and I am sure this would be the dilemma of half the moms in the world.  But in the long run everyone survives and so shall he!! Fingers crossed!!
I love experimenting with new recipes. A few days back I came over this recipe of Involtini and it looked delicious and most important really simple to make. Grilled eggplants rolled with a filling of ricotta and baked topped with fresh mozzarella and pasta sauce sounded deliciously appetizing. There is something about eggplants, inspite of its versatility, that most people either like it or hate it. Though the recipe is essentially a meatless version, I threw in a layer of minced meat at the bottom to make it a bit lucrative for the fussy eaters in our house. 
To my surprise the fussy eater loved it!! Yipee!! I felt I had won an Oscar because I was so sure he was not even going to taste it. Maybe the eggplants couldn't be deciphered, well hidden under the bubbling mozzarella cheese and pasta sauce or perhaps the whole combination with the mincemeat did the trick but whatever it was it left me a very happy soul!! And yes I am going to make this dish again soon to make sure it wasn't just a lucky fluke. If you too have a fussy eater in your house, do try this recipe. Who knows you too might hit a jackpot.
Serves 4-6
Prep time: 20 min    Cooking time: 35 minutes

Ingredients
3 medium sized eggplants 
1/4 cup olive oil
1 cup feta cheese
1/2 cup pine nuts
1/3 cup raisins soaked in hot water for 10 minutes until they plump up
2 tbsp bread crumbs
1 garlic clove, minced
finely grated zest of 1 lemon
11/2 tsp dried mint
2 tbsp chopped parsley leaves or 1 tsp dried parsley
1 large egg (can be omitted)
salt and freshly ground black pepper
21/2 cups pasta sauce ( I used a store bought one but you can make it fresh too)
1 large ball fresh mozzarella in 1/4 inch slices
  • Heat oven to 375 F.
  • Cut the eggplant into slices about 1/2" thick. Place a heavy skillet over medium heat. working in batches, brush eggplant slices on both sides with olive oil and cook, turning till the eggplant turns soft. Keep aside to cool.
  • In a large bowl combine feta, pine nuts, raisins, 1/3 cup extra virgin olive oil, bread crumbs, garlic, lemon zest, mint and parsley. Mix in egg and season to taste with salt and pepper.
  • Spread the eggplant slices on a surface and divide stuffing evenly among them. Place 1 to tbsp. at one end of each slice. Roll up slices tightly to secure filling and place in a 9x13 inch baking dish (or other shallow baking pan in which rolls fit snugly in a single layer)
  • Pour the pasta sauce on top of the eggplant rolls. arrange mozzarella slices in a line lengthwise down center of the pan. Drizzle olive oil evenly over the pan and season to taste with salt and pepper.
  • Bake until cheese  has melted and eggplant is bubbling and fragrant, 25 to 30 minutes.
  • Remove from heat and allow to stand 5 to 10 minutes. Serve hot.

Monday, 15 February 2016

Surprise Hidden Heart Cake

Slice this delicious heart cake and find the surprise heart shaped design running through the middle.....how gorgeous can it be!! Just perfect to win anyone's heart over.
This is like something out of Ripleys believe it or not, isnt it? 
At least that is what I thought when I first saw the cake. I was amazed at how a heart shape came to be so perfectly designed inside another cake. This cake left such an indelible mark on my mind that ever since I saw it I have been itching to try it out. It has been on my wish list of things to try out at least once in my lifetime since long and finally I am able to strike it out. Yay!!
But believe me this has no magic trick. In fact when you go through the recipe you will see just how simple it is and yet so effective.
I kind of took a shortcut by using a store bought cake mix as there was just too much going on that day. Aren't we all allowed to cheat sometimes and what really matters is the thought behind the dish. In case you don't want to be lazy like me and want to have the real deal follow this great recipe of Martha Stewart's Classic pound cake and make two times the recipe as we need two cakes.
So here goes; the secret is unveiled to the great magic cake.....Go ahead and surprise your loved ones with this cute little heart baked inside the cake.

Serves 10-12
prep time: 30 mins
cooking time 30 min plus 30 minutes

1 box Betty Crocker super moist devil food cake
1 box Betty Crocker super moist yellow cake mix
1/2 tsp red food coloring gel
A small cookie cutter
A 5 X 9 inch loaf pan

First take the yellow cake mix and following the directions given behind the box mix up the ingredients inside the box. Once that is done add the red coloring gel to the yellow cake mix.
Pour the prepared batter in a 5 by 9 inch loaf pan and bake according to the instructions. Once the cake is baked cooled and removed from the pan, transfer it to the freezer for about 20 minutes as it is much easier to cut a frozen cake.
Take a serrated knife and cut the entire loaf into thick 3/4 inch to 1 inch slices. Then use the cookie cutter to cut hearts from the center of each slice. (I actually managed to get two hearts from  1 slice. You can do that if you position cutter carefully and start from one extreme corner of a slice) 
Once your hearts are done, go ahead and prepare your second batch of chocolate batter following the instructions given behind the box, For best results use the same loaf pan you used for the first cake. Be sure the pan is very clean and re-greased. Place a very thin layer of batter on the bottom of the loaf pan.
Then carefully stack the hearts in an upright position inside the pan in a straight line. Gently press the bottom point of the hearts into the layer of batter on the bottom of the pan. 
Pour the remaining batter on the sides of the hearts and then top of the hearts. make sure that they are completely covered with the batter. Use a rubber spatula to smooth the top surface, then bake as per the instructions given behind the box. To make sure the cake is fully baked insert a toothpick near the centre till it comes out clean.
Once the hidden heart cake is baked, tranfer to a wire rack to cool in the pan for 30 minutes. Then remove from the pan and cool it completely, 
Slice and surprise. 

Friday, 12 February 2016

Poached Pears with Chantilly Cream

This Valentine's Day try out this elegant dessert for your loved one or even for yourself. It not only looks exquisite but tastes amazingly delicious too!! 
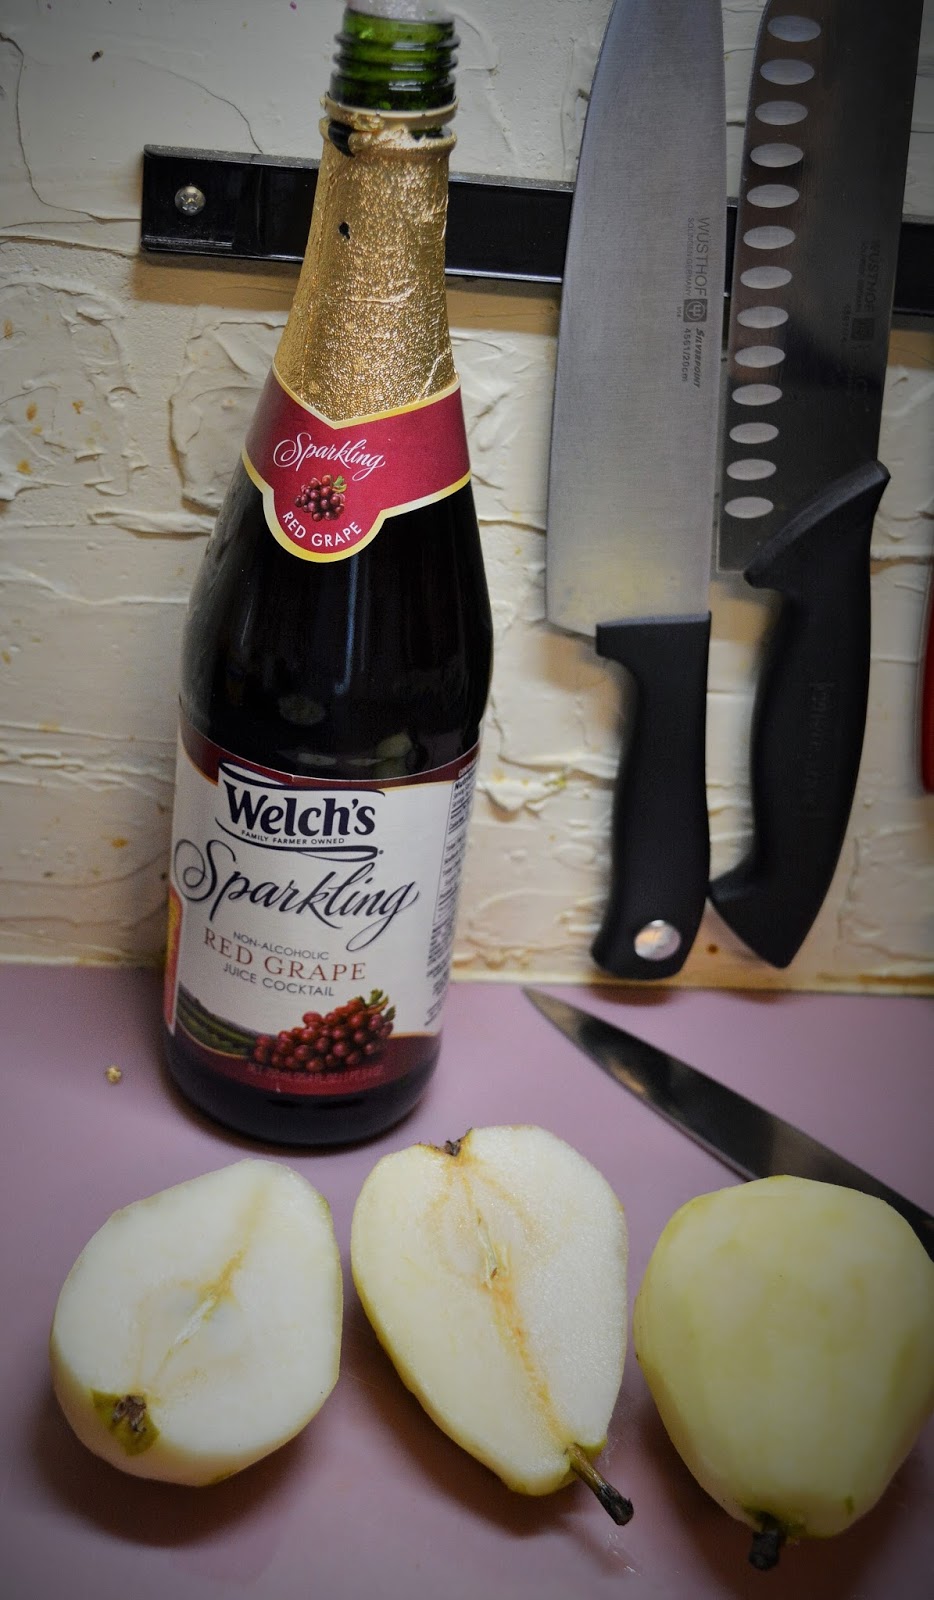
Though normally the pears are poached in Red Wine,  I altered the recipe a bit and instead poached the pears in pomegranate juice just so that the kids could enjoy it too. The effect was as striking as I got a beautiful dark red color on the peaches after they got poached. 
The melt-in-the-mouth soft peaches poached in the aromatic, velvety sauce leaves your taste buds screaming aloud for more and the best part is that they are so simple to make. These canbe prepared ahead of time and would be great to make for a big gathering.
Served with whipped cream they were delicious and I am already getting requests from my kids to make them again.

Serves 4-6        
Prep time: 15 min               Cooking time: 45 min
Ingredients
4 pears slightly under ripe
1 quart pomegranate juice (you can also use cherry or grape juice)
1 lemon cut in half
1 tbsp. vanilla extract
1 cinnamon stick
3 cloves
For the whipped cream:
1 cup heavy cream
1 tsp vanilla essence
3 tbsp. powdered sugar
Peel the pears and then cut them in half from top to bottom.

 Use a small spoon to remove the seed bail.
Add the lemon halves, lemon juice, vanilla, cinnamon and cloves and place the pot over medium heat.

 Place the pears in a medium sized pot just big enough to hold them.
 When the liquid just begins to steam, cover the pot and reduce the heat to low.
Cook for about 45 minutes and then test the pears to see if they are cooked.
They should be tender but not falling apart.
When the pears are cooked, remove them from the liquid with a slotted spoon and then set them aside.
Reduce the liquid by cooking it over medium heat until it begins to thicken just a little, about 15 minutes.
Return the pears to the liquid and allow to cool.
Finish off with a serving of Chantilly cream on top. 
For the whipped cream combine the whipped cream, powdered sugar and the vanilla in a chilled bowl. Whip on medium high speed until soft peak forms.
Serve the poached pears with the Chantilly cream or Vanilla ice cream,

Thursday, 11 February 2016

Grilled Red Peppers in the Philips Airfyer

Need I tell you how much I am in love with my Philips Airfryer!! it is my go to, go for, go everything magic machine for just about everything. Out of all my appliances (and I have every imaginable appliance you can think of...some I wonder why I have them in the first place as they see the light of day once in a bluemoon like my Quesadilla tortilla maker, waffle maker, smoothie maker, empanada press(seriously what was I even thinking?) and many others which are just lying around useless and unused. I guess when you are fond of cooking, like me,it just feels good to be surrounded by all the possible gadgets, you never know what might come in handy!!
To cut the story short, out of the gazillion things I own, this one is my absolute favorite. Its no-nonsense, a breeze to use, no sweat quality appeals to me the most. Whether it is meat or vegetables it grills almost anything to utmost perfection and this makes me go back to it again and again. And I am sure anyone who owns this will agree with me totally. 
I can also proudly profess that my experiments with the Airfryer has impressed many of my friends enough to go and invest in one. So Philips you owe me one!!
My absolute favorite thing to make in my Airfryer is grilling bell peppers. I love how the Bell peppers add a lot of flavor, sweetness and color to any dish without the pungent pepper flavor and roasting them heightens their sweetness. I always try to have a batch ready in my fridge to use as I like to add them in a lot of varied recipes. 
You can use them in dips, soups, casseroles, pizzas, pastas or slice them and use them directly on breads, tarts, stir fries, in wraps amongst a few other things. They really help to boost the color and flavor of the dish. You can also make a big batch and freeze them or puree them with olive oil though I haven't tried it personally as yet.
Red peppers are also a great source of beta-carotene(Vitamin A) and Vitamin C so nutritionally they are a big thumbs up for you and your family.
The biggest advantage of grilling your veggies in the Airfryer is the time factor, Compare grilling peppers for 20-30 minutes in an oven over 10 minutes in the airfryer and I don't need to tell you what most of you are going to choose!! And then there is just no fear of over charring them. You can literally pop them in the Airfryer, go about your other chores and they are ready to use in just 10 minutes. 

Method:
Preheat the Airfryer to 390 F.
Place the whole peppers in the airfryer basket and spray some oil on them,
Set the timer to 10 minutes. After 10 minutes the peppers have shrunk and the skin becomes wrinkled and charred.
Remove them from the basket and cover with an aluminium foil or plastic bag till completely cool.
Once cooled, peel the skins away with your fingers or a paring knife.You can even leave some blackened char on the pepper as it lends a smoky taste to the dish.
Cut them in half and remove the stem and scrape out the seeds.
Use as desired.

Here are some great ways in which you can use the red pepper in various dishes :
http://www.williams-sonoma.com/recipe/grilled-red-pepper-sweet-onion-and-tomato-salad.html
http://www.dishmaps.com/roasted-red-pepper-hummus/19945
http://www.foodnetwork.com/recipes/food-network-kitchens/roasted-red-pepper-soup-recipe.html
http://www.healthy-delicious.com/roasted-red-pepper-and-egg-tart/
http://www.mccormick.com/Gourmet/Recipes/Main-Dishes/Chicken-with-Rosemary-Red-Bell-Peppers-and-Olives

I used them here to make a quick meal of some leftover roasted pork and grilled peppers fajitas.


Wednesday, 10 February 2016

Citrus Sage Chicken in the Philips Airfryer

Be ready to be bowled over by the fresh citrus flavors in this wonderful recipe!!
You will get an extremely moist tender chicken from the citrus marinade and has an earthy flavor from the sage. This is an extremely easy recipe and the best part is that it can be made on a grill, or seared in a skillet or cast iron pan which I love cooking on, or toss it in together with some cut citrus fruits to bake it off in an oven. This time around I have grilled it in my favorite kitchen appliance - that is the Philips Airfryer. It grills all kinds of meats perfectly giving a lovely charred taste from the outside and keeping it tender and moist from the inside, locking in all the flavors. I even love to grill my vegetables in the Airfryer which are done to perfection in just no time. It took me some time and after a few trial and error I think I can now confidently say that I have mastered the timing on my Airfryer to grill my meat and veggies to the perfect temperature that I would like them to be. 
If there are any leftovers, shred the chicken and use it in a wrap along with caramelized onions and grilled peppers.Its delicious. I always make an extra batch of the chicken and freeze it to use it for later to make wraps or grilled sandwiches.
You can use any cut of chicken you prefer- chicken thighs, breasts or drumsticks or all of them. I had boneless chicken lying in my freezer so that is what I have used for this recipe
The marinade is really simple to put together and is really quick and easy to make. Also you can double the citrus sage mixture and reserve half of it. Serve the reserved mixture as a sauce to spoon over the grilled chicken. If you have extra citrus peels and sage and are using a charcoal grill, toss them into the charcoal to flavor the smoke. I tossed a few inside the Airfryer and did have an distinct added citrusy flavor to the chicken.
Try it tonight and I can assure you it will soon become your favorite go-to recipe for a quick fix meal. 

Recipe adapted from the book "Good Housekeeping's Grill it!"
Prep: 25 minutes plus marinating         cooking time: 10-12 minutes 
Makes 8 servings 

2 large oranges 
2 large lemons 
1/4 cup fresh sage 
2 tbsp olive oil 
2 tsp salt 
1 tsp coarsely ground black pepper
7-8 pieces of boneless chickens breasts (you can also use a whole chicken cut into eighths)

Grate 1 tbsp peel and squeeze 4 tbsp juice from oranges. 
Do the same with the lemons In a large bowl with a wire whisk or fork combine orange and lemon juice, zest, sage, oil, salt and pepper. 
Add chicken turning to coat. 
Cover and refrigerate for 2 hrs, turning chicken pieces 3-4 times.
Preheat the Airfryer to 360F.
Place the chicken pieces into the basket of the Airfryer. 
Thinly slice an orange and place a few pieces on top of the chicken.
Heat the chicken at 360F for 8 minutes. 
Open the Airfryer basket and turn the chicken pieces over.
Bump up the temperature of the Airfryer to 390F and cook further for 4-5 minutes till no longer pink from inside.  You can also insert a meat thermometer to see that the internal temperature has reached 145 F.
Rest the chicken for 4-5 minutes before serving. 
Alternately you can also grill the chicken in an oven or a outdoor grill. 
Place the chicken on a hot grill for 20 minutes. Turn chicken over and grill for 10-12 minutes more till juices run clear when chicken is pierced with tip of knife.
Try this citrus, sage and olive oil blend as a simple seasoning for veal chops or pork as well as for chicken.

Sunday, 7 February 2016

Strawberry Shortcake with Creme Chantilly: Celebrating Love

"Wine comes in at the mouth,  
And love comes in at the eye;
 That’s all we shall know for truth,  
Before we grow old and die.

I lift the glass to my mouth, 
I look at you, and I sigh."

                                       - (WB Yeats, A Drinking Song)
Its that time of year again when the whole world celebrates Love with Flowers, wine and chocolates. Valentine's Day is just around the corner and "love" is literally on display everywhere you go. 
Card? Chocolates? Flowers? A romantic dinner for two? An expensive gift? It actually can get quite crazy trying to think of the perfect git for your Valentine to show them how much you care for them. Or save yourself the trouble and bake this gorgeous cake for your sweetheart to add sweetness to your Valentine's Day. After all as they say," A way to a man's (or should I say your Valentine's) heart is through their stomach!!" Try out this simple shortcake, filled with layers of whipped cream and strawberries to make a great impression.
By the way, do you know the story about why Valentin's Day is celebrated? Well, long. long time ago there was a selfless priest called valentine who stood up to the Roman emperor Claudius II when he outlawed marriage in 278 AD as he decided that single men made better soldiers than those with wives and children. Valentine realizing the injustice of the decree, defied Claudius and continued to perform marriages for young lovers in secret. Valentine was beheaded for his insolence and before his execution he wrote a letter to his jailer's daughter, possible after falling in love with the young girl who visited him during his confinement, which was signed 'From your Valentine'. In 496 AD, February 14 was declared Valentine's day, dedicated to celebrating lovers. 
So here's Cheers to all of you celebrating your love and your loved ones. 

I will leave you here with these beautiful lines from Shakespeare's sonnets:
“Love is not love which alters it when alteration finds, or bends with the remover to remove: O no! It is an ever fixed mark that looks on tempests and is never shaken; it is the star to every wandering bark whose worth's unknown, although his height be taken. Love's not Time's fool, though rosy lips and cheeks within his bending sickle's compass come: Love alters not with his brief hours and weeks, but bears it out, even to the edge of doom." (Sonnet 116)” 

Prep time: 20 minutes
cooking time: 35 minutes
Serves 3-4
Ingredients:
2 cups all-purpose flour
1 cup sugar
1 teaspoon baking powder
1/2 teaspoon salt
1/2 cup cold butter cut into chunks
2 large eggs
2 pints ripe strawberries
1/4 -1/2 cup sugar, more depending on desired sweetness
1 cup heavy cream
1 teaspoon vanilla
3 tablespoons powdered sugar

Directions:
For the shortcake: 
Preheat the oven to 350 degrees. Combine the flour, sugar, baking powder, and salt in a medium bowl. 
Cut the butter into the dry ingredients with a pastry blender or by hand. 
Whisk the egg and add to the dry ingredients. 
Mix with a fork until the ingredients just stick together.
Turn dough out onto a lightly floured surface.  Knead lightly several times to form a ball. (dough will be grainy). 
Press into a heart shaped cake pan. 
Bake at 350 for 30-35 minutes or until barely golden brown. Cool in pan on a wire rack 10 minutes; remove from pan. Cool completely on wire rack.
For the strawberries: Wash and slice the strawberries. Sprinkle the strawberries with sugar and toss to coat. Remove half the strawberries and mash them with a potato masher till they are soft and syrupy. Keep aside. Slice the rest of the strawberries horizontally.
For the whipped cream: Combine the whipped cream, powdered sugar, and the vanilla in a chilled bowl. Whip on medium high speed until soft peaks form.
To assemble : Cut the cake horizontally into half. Place one half of the sliced cake onto a serving platter. Spoon some of the mashed strawberry syrup on the cake to soak it completely. Top with whipped cream and sliced strawberries.
Carefully put the top layer of cake, cut side down over the strawberries. Spread the Chantilly cream to cover the top completely. Decorate it with sliced strawberries and extra swirls of cream.