Pages

Showing posts with label Dessert. Show all posts

Tuesday, 22 March 2016

Marion Burros's Classic Plum torte

This torte is a legend in itself. First published in the New York Times by Marian Burros in 1983, the recipe was so popular that it was published every year during plum season for nearly two decades. years. The following year when the readers were informed that they would no longer be publishing the recipe and they save their clippings of the recipe there was a big uproar. Understandably!! Make this recipe and you will know exactly why!!
This recipe is a definite keeper and the best part with just a handful of ingredients it is so so simple to make. Though it is just a straightforward batter of flour, butter, sugar, eggs and the divine sweet and sour plums, it is perfect in every aspect.
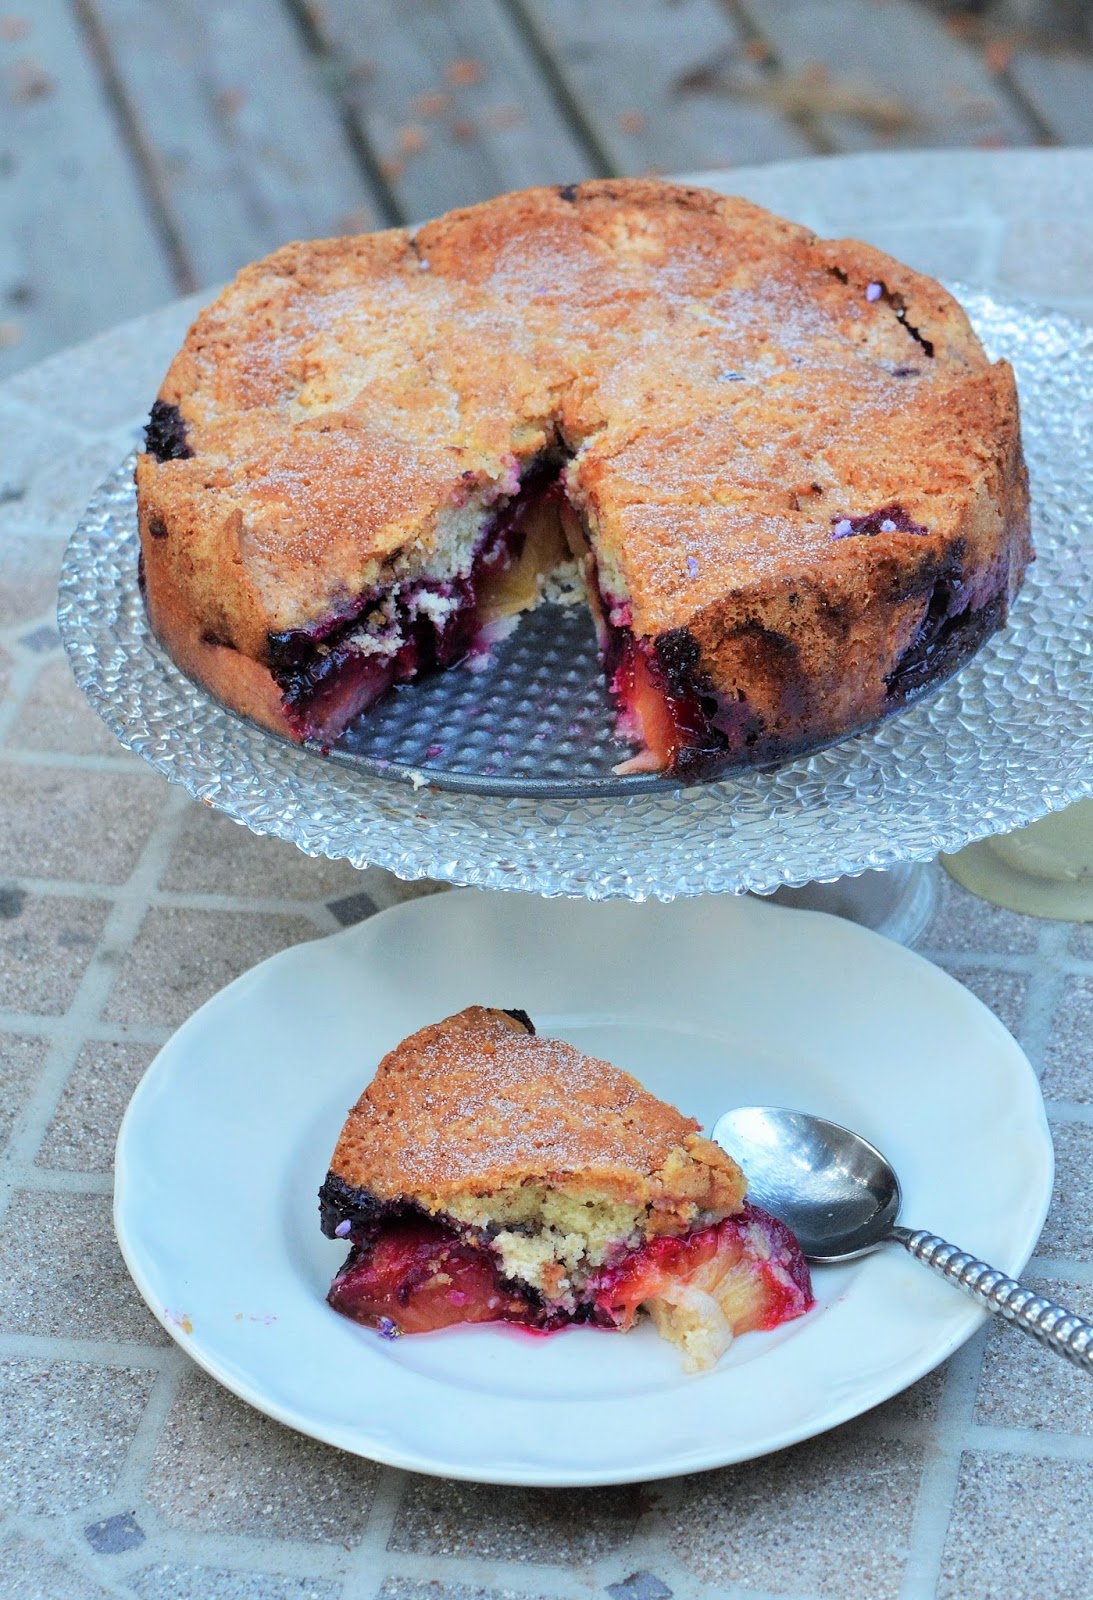
The end result is a light buttery cake with fresh plums inside which when baked release their juices inside and become all soft and gooey make it incredibly moist and irresistibly delicious combination of sweetness and tanginess all in one bite!!
To make sure the recipe wasn't just a one time fluke I tried it out again (pic below) some time later following the recipe to the 'T' and I wasn't surprised that it turned out as wonderful as it had the first time. 
If you can resist, though I know it would be very hard to, wait a day before you eat the torte. Upon resting, the plums release their juices and merge with the cake around it - kind of like a cake with its own sauce. And when you thought it couldn't get any better - here is another great thing about this decadent dessert - it freezes beautifully!! So you can do a couple of batches when the plums are in season and pop them in your freezer to enjoy later on. To freeze, double wrap the tortes in foil, place in a plastic bag and seal.
Try it out and I am sure you will fall in love with this delicious dessert just like I have!!

Recipe adapted from The New York Times
Serves 8
Prep time:10 min           Cook time:50 min

3/4 cup sugar
1/2 cup unsalted butter 
1 cup unbleached flour, sifted
1 tsp baking powder
pinch of salt
24 halves pitted purple plums 
2 eggs
1 tsp cinnamon 
sugar and lemon juice for sprinkling on top
Heat oven to 350 F.
Cream the butter and sugar together in a large bowl.
Slowly add the flour, baking powder,salt and eggs and beat well.
Add the eggs one at a time and beat well till combined.
Pour the batter into a 8, 9 or 10 inch springform pan, smoothing the top with a spatula.
Place the plums skin side up atop the batter, nearly covering it.
Sprinkle lightly with sugar and lemon juice, depending on the sweetness of the fruit.
Sprinkle with cinnamon on top.
Bake for approximately 45-50 minutes until a toothpick inserted in the center comes out clean.
Remove and cool: Refrigerate for a day if possible if you plan to serve it the next day. Otherwise just dig in and enjoy it lukewarm!!
To serve a torte that was frozen, defrost and reheat it briefly at 300 degrees.

Friday, 12 February 2016

Poached Pears with Chantilly Cream

This Valentine's Day try out this elegant dessert for your loved one or even for yourself. It not only looks exquisite but tastes amazingly delicious too!! 
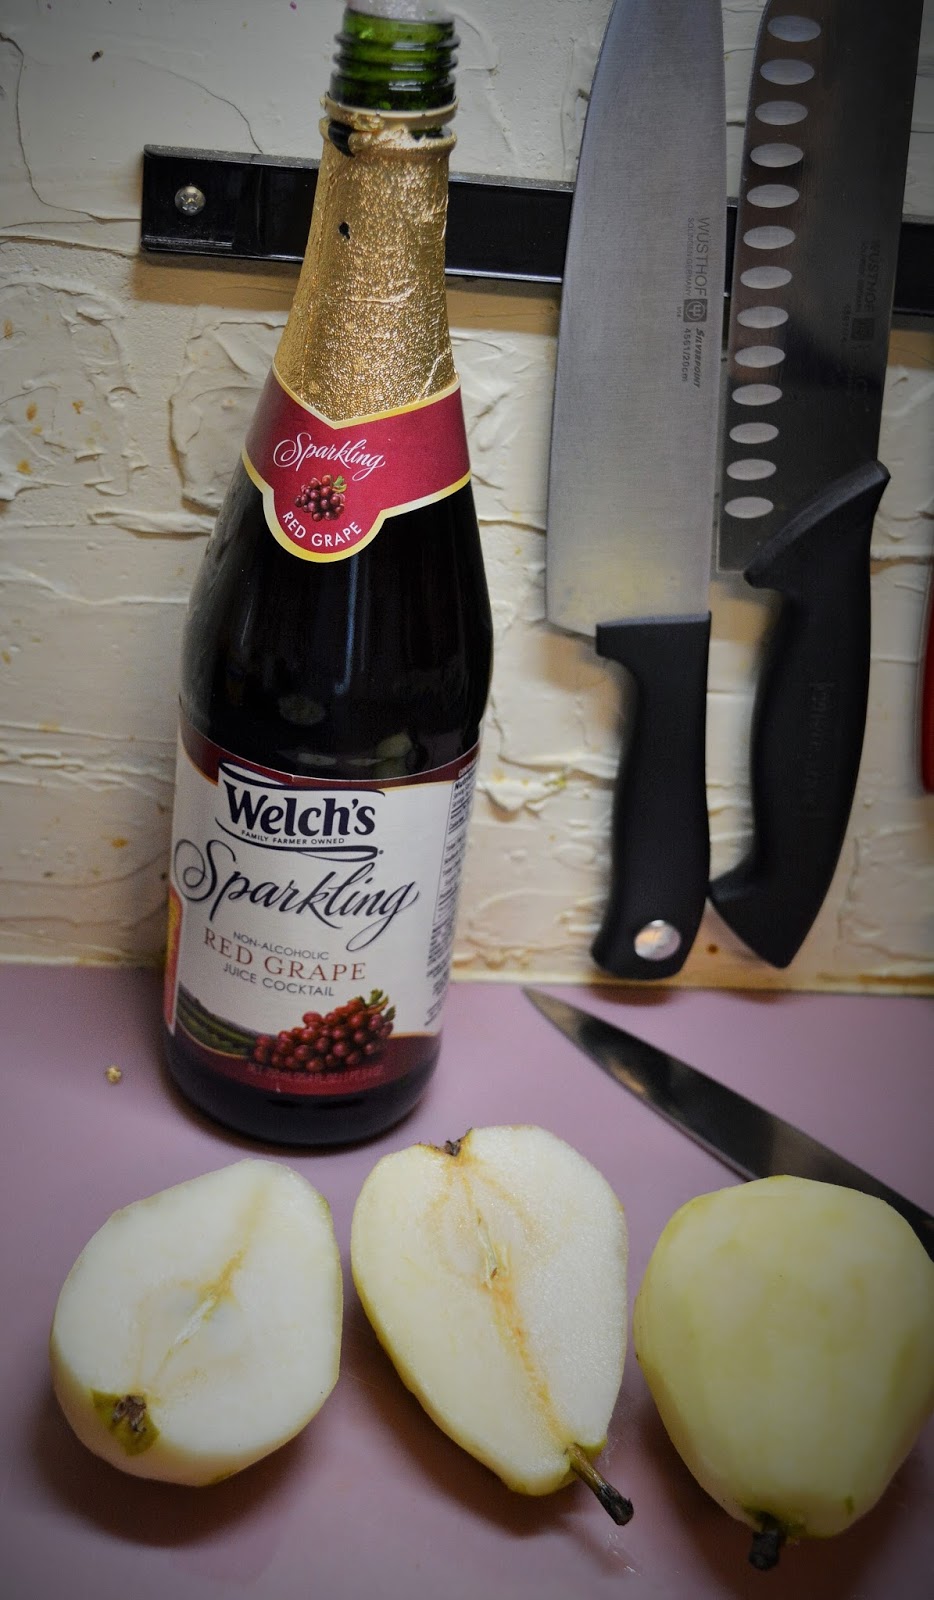
Though normally the pears are poached in Red Wine,  I altered the recipe a bit and instead poached the pears in pomegranate juice just so that the kids could enjoy it too. The effect was as striking as I got a beautiful dark red color on the peaches after they got poached. 
The melt-in-the-mouth soft peaches poached in the aromatic, velvety sauce leaves your taste buds screaming aloud for more and the best part is that they are so simple to make. These canbe prepared ahead of time and would be great to make for a big gathering.
Served with whipped cream they were delicious and I am already getting requests from my kids to make them again.

Serves 4-6        
Prep time: 15 min               Cooking time: 45 min
Ingredients
4 pears slightly under ripe
1 quart pomegranate juice (you can also use cherry or grape juice)
1 lemon cut in half
1 tbsp. vanilla extract
1 cinnamon stick
3 cloves
For the whipped cream:
1 cup heavy cream
1 tsp vanilla essence
3 tbsp. powdered sugar
Peel the pears and then cut them in half from top to bottom.

 Use a small spoon to remove the seed bail.
Add the lemon halves, lemon juice, vanilla, cinnamon and cloves and place the pot over medium heat.

 Place the pears in a medium sized pot just big enough to hold them.
 When the liquid just begins to steam, cover the pot and reduce the heat to low.
Cook for about 45 minutes and then test the pears to see if they are cooked.
They should be tender but not falling apart.
When the pears are cooked, remove them from the liquid with a slotted spoon and then set them aside.
Reduce the liquid by cooking it over medium heat until it begins to thicken just a little, about 15 minutes.
Return the pears to the liquid and allow to cool.
Finish off with a serving of Chantilly cream on top. 
For the whipped cream combine the whipped cream, powdered sugar and the vanilla in a chilled bowl. Whip on medium high speed until soft peak forms.
Serve the poached pears with the Chantilly cream or Vanilla ice cream,

Thursday, 4 February 2016

White Chocolate Bread Pudding with White Chocolate Rum Sauce


Thick white slices of french bread soaked in a pool of dreamy white chocolate sauce, this White Chocolate Bread Pudding is truly the ambrosia of the Gods!! Incredibly rich and decadently indulgent, this dish is surely not for the faint-hearted. 
When I read the recipe for the first time I took a double take when I read through the ingredients list- 18 egg yolks!! Seriously? But believe me it works!! It really works!! 
The bread dipped in the rich chocolately creamy dense custard and topped with the rum chocolate sauce - It all comes together in a beautiful explosion of flavors which will have your taste buds begging for more and more and some more... 
Every month my son's school hosts a staff appreciation lunch. This month the theme was Mardi Gras with a Jambalaya Luncheon and for dessert they served the white chocolate bread pudding. Any parent volunteer who was keen to help out was mailed the recipe so that they would have consistency across all the dishes. This particular recipe mailed to me by one of the PTO members, I believe is attributed to the chef (known to one of the teachers in the school) from the restaurant Coosh's Bayou Rouge in Tallahassee, Florida. It is also featured in the Junior League, Texas Tables Cookbook.
I was a bit apprehensive before I set out to make the dish but seeing the fabulous response that it got at the luncheon (there were people coming back for seconds and also third helpings too and quite a few takeaway too!!) and I was constantly doling out the dessert at a neck breaking speed trying to keep up with the demand for people showing up for it. I think I must have gone through atleast 9-10 big dishes in one and a half hour I was there. I  can now understand what the contestants in the Masterchef show must be going through in their team challenges, cooking and keeping up with serving a huge crowd.
But what a pleasure it was!! it it was great to see the staff members thoroughly enjoying themselves. This is such a small way to show our appreciation compared to the great service that they our providing to the nation and the lasting contribution they make to our lives by handling our little brats in such a wonderful way!! Hats off to all of you!!


Ingredients for the pudding (Serves 8-10)

18 egg yolks

1 cup of sugar

pinch of salt
1 tsp vanilla
tsp nutmeg
2 cups heavy cream 
1 heaped cup  white chocolate chips 
1.5 inch slices of french bread 

Rum Sauce for White Chocolate Bread Pudding
3 egg yolks
1/4 cup sugar

1 tsp nutmeg

1 cup heavy cream

1/2 cup white chocolate chips
1 tsp vanilla essence
1/4 cup rum

Place heavy cream in sauce pan, when it starts to simmer 
 add white chocolate chips
and continue to simmer until chocolate melts completely
 Keep aside till the mixture is very cool.
Cut the loaf of bread into approximately 1.5” slices and arrange as in the pic below.
 Place bread in pan, laying half of each slice on the other. 
If you haven't done so already, separate the egg yolks and egg whites. How pretty they look!!

Yes you will have a whole lot of egg shells and a lot of egg whites. I freeze my egg whites for later use.
In a bowl, whisk together the eggs, sugar, salt, vanilla and nutmeg

 till they are creamy.
Add cooled cream mixture into whisked mixture slowly, if cream mixture is still hot it will start to make scrambled eggs if you put it in too fast.
Pour this mixture over bread and place in refrigerator to set.

You can leave the bread to soak overnight or bake it at night just  in time for dinner.                 

 In the morning, bake covered for one hour at 350 degrees, then uncovered for 10 minutes. 
  Unless your oven runs hot and you might want to cut that back a bit. It could still be a little runny, so if it isn’t burning, let it cook a little longer.
Can also be made a day ahead. cover with foil and refrigerate. Reheat the covered pudding in 350 F oven for 30 minutes before serving. In my opinion the bread pudding tastes good as it is but if you want to add an extra kick to the dish serve with with the White chocolate Rum sauce. 
To make the sauce :- Mix all in sauce pan and simmer until a little thicker than heavy cream.
This is plenty for one or even two pans of pudding.
One can never have enough chocolates in their life time!!

Friday, 22 January 2016

Brownie butter cake

Craving a cake right now? Or do you feel like having a brownie? Or are like me and cannot  make up your mind and feel like having both cake and a brownie. What if I tell you that you can have the taste of both brownie and cake in the same bite? Can't believe it? It's true. You can actually get both of them in one bite. Its like hitting two birds with one stone!!
Close your eyes and now picture yourself sinking your teeth into the gooey-ishness of a brownie and tasting the rich vanilla dense butter cake all at once, you will start feeling as if you are in a dream cake heaven its so wonderfully delicious. Life can't get better than this- atleast for me.
Here is a wonderful recipe for a brownie butter cake which has a layer of both a brownie and cake in the same pan. The trick is that you bake the brownie first and while the brownie is baking, make your butter cake batter and pour it over the baking brownie and smoothen it quickly before popping it back into the oven. And voila your double treat is ready!! Sounds simple doesn't it?
Serves 8-10
Prep time: 30 minutes
Bake time: 55 minutes
(Recipe adapted from Kevin Chai- I Love Butter Cake too)


Ingredients
To make the brownie:
5oz dark chocolate (broken into pieces)
¼ cup unsalted butter
¼ cup brown sugar
1 Egg
¼ cup all-purpose flour
To make the butter cake:
½ cup unsalted butter
½ cup sugar
2 Eggs
1 cup all-purpose flour
¼ tsp baking powder
3 ½ Tbsp fresh milk
METHOD:
Grease and line a 8" baking pan.
Preheat oven to 350F.
To make brownie, melt chocolate and butter over low heat. Remove and leave to cool slightly. Stir in the brown sugar and whisk well until completely blended.
Add in egg, mix well to incorporate fully. 
Fold in the flour, mix gently until well combined. 
Pour batter into the prepared pan. Bake in preheated oven for 15 minutes. Remove.
While your brownie is baking prepare the batter for the butter cake.
Beat butter with sugar until creamy. Add in the eggs, one at a time, beating well after each addition.
Fold in sifted flour and baking powder, alternately add in fresh milk, mix to form batter.
Spread the butter cake batter over brownie.
Bake in the preheated oven at 350F for 25-30 minutes or until a cake tester inserted in the comes out clean.
Sit back and enjoy your double treat.

Monday, 7 December 2015

Beginners Guide To Making The Perfect New York Cheese Cake


Want to celebrate a special occasion with something effortlessly elegant?
Try out this creamy, rich dense cheesecake that is everything that you have ever dreamt it could be!!
Before I tried out this no-fail recipe, I also had my share of disappointments in the shape of dense, sunken cheesecakes before I realized that there are just a few simple rules to follow if you want your Cheesecake magic to work like a dream.
Below here, I am sharing a few tricks with you which I hope would help you a step closer to making your perfect cheesecake.

Tips to bake the Perfect cheesecake :
First and foremost, it is most important that all the ingredients should be at room temperature. So go on, take out your eggs, cream cheese and sour cream from the fridge and put it out on the counter for at least 30 minutes.
I like to use sour cream in my recipe, as in addition to giving the cheesecake a moist, smooth texture, it helps to alleviate the taste by lending a lovely tang which I love.
Also, I found that by adding just a little bit of flour or corn-starch to the cheesecake batter helps insure against the cheesecake top from cracking and results in clean, firm slices, though it does make the texture a teeny-weeny bit denser, and it is not as super creamy as it would be if you bake with only eggs. But the difference in the texture is very slight and can be overlooked if you are looking for a firmer sturdier cheesecake.
A water bath is another thing that helps you in getting amazing results with your cheesecake. Just wrap the bottom and the sides of the cheesecake pan in foil. This helps keep any water from seeping inside through the cracks of the pan when you place it in water. Once the pan is all wrapped up, place the cheese cake pan in a roasting pan or a large baking dish filled with a few inches of water. A steamy oven will help keep the cheesecake moist and prevent it from drying out.
Make sure when you are making your filling, beat it an extra minute or two, so that it is satiny smooth and lump free. 
I like to bake my crumb crust for a quick 10 minutes in the oven before putting in my filling. This gives you a nice crisp crust.
Absolutely, absolutely no opening the oven door to peek inside, however tempted you might be to check on the cheesecake while it is baking. This lets all the warm air escape out and any changes in temperature can cause the cheesecake to crack or sink in the middle.
Also no poking to see if it’s done. All it is going to leave you is a big hole in the middle and we surely don't want that. Just be patient and trust me when the baking time is done it will be cooked. The only way to find out if it is done is to give the dish a slight jiggle. If it is firm at the edges and a bit wobbly in the center that means it is done.
Congratulations!! You know now how to bake the perfect cheesecake, but wait there is a little more to come. Be patient you are almost there!!
The only thing left to do is to chill the cheesecake, uncovered for at least 4 hours or (ideally) overnight in the refrigerator. This is crucial for setting the cheesecake and getting a firm texture.
Now that you have learned all the tips and tricks to make the smoothest, most delicious creamy cheesecake ever, what are you waiting for?
Just follow the recipe below and reach your Cheesecake Nirvana!!
Ingredients
2 cups gingersnap cookie crumbs
5 tbsps. butter
5 pkg (8oz each) Philadelphia cream cheese, softened
11/4 cup sugar
1/2 cup sour cream
1/8 tsp salt
1 tsp lemon juice
5 large eggs
2 tbsps. flour or 1 tbsp. cornflour
1 tsp vanilla essence
Method
Preheat the oven to 475F.
Wrap a large piece of foil around the bottom and sides of the pan to prevent the water from going in during the water bath.
To make the crust:
Crush the cookies in a food processor or in a ziplock bag using a rolling pin until they form fine crumbs – you should have about 2 cups. Melt 5 tablespoons butter in the microwave or stove top and mix it in the cookie crumbs, the mixture should look like wet sand and hold together when you press it in your fist.
Press the crumb mixture onto bottom and up the sides of a 9 inch spring form pan.
Place the pan in the oven to bake the crust for 8-10 minutes till just starting to brown around the edges. Remove from oven to cool completely. Place a large roasting pan filled with 1 inch water while you prepare your filling. This will be your water bath.
To make the filling:
With an electric mixer, beat the cream cheese on low speed till smooth and creamy and no lumps are found. Gradually add in the sugar, sour cream, flour, lemon juice and vanilla. Whisk the ingredients for 5-7 minutes till the mixture is smooth and creamy.
Mix in the eggs one at a time till well mixed.
Pour the mixture into the spring form pan on top of the cooled crust.
Place the cheesecake pan into the water bath in the oven.
After 10 minutes reduce the heat to 350F and bake for another 50-60 minutes or until the top is golden brown.
Turn the oven off, leaving the door half open and cool the cheesecake for an hour inside the oven.
After an hour, remove the cheesecake from the oven and from the water bath, remove the foil and transfer it to a cooling rack.
Run a thin bladed knife around the edge of the cheesecake to loosen the edges. Let the cheesecake cool completely.
Chill the cheesecake uncovered for atleast 4 hours or preferably overnight in the refrigerator.
Take the cheesecake out of the fridge about 30 minutes before you plan to serve.
Unmold the cake and if desired serve garnished with fresh fruits. If there are any leftovers, which I seriously doubt, store them uncovered in the fridge. 

Wednesday, 26 August 2015

Apple pie - dedicated to all my friends - old and new!!

" A Friend is one that knows who you are, understands where you have been, accepts what you have become, and still, gently allows you to grow" - William Shakespeare
You know what is the most difficult part about relocating yourself to a new place, even more so to a new country? - It is to find new friends!!
Yes!! That has by far being the hardest part for me when we shifted to Houston almost 10 months back.
Having taken premature retirement from the army, me and my husband were living a blissful existence in Gurgaon surrounded by the cosy cocoon of our family and friends. As luck would have it, at that time some our our closest friends were stationed in Delhi and another few, who like us, had also taken early release from the army and were now working in Delhi in private sectors. Being associated with each other since the last 20 years you can imagine what a blast we had whenever we got together. We all gone through so many ups and downs together, celebrating and sharing the best and the worst with each other.
The kids too had literally grown up together and they had their own party going.
With good friends around, its always party time and we made the most of our time that we were together, never missing an opportunity to get together at the slightest of excuse. Whenever we met, it felt like being transported back in time, reliving our past by rekindling old memories with many a repeated stories (not one of us got tired of listening to them again and again) and the anecdotes and rolling in laughter as they were shared. (Infact at one time my daughter commented that," Mom I have never heard you laugh so much. You all were behaving like kids!!" ) Well!! That was the magic of the company of dear friends.

Looking back now, I realise how precious those moments were and how much I miss having them around. Sigh!!!
Cheers to our good times together and many more to come!!

Life mein har ek friend jaroori hota hai!


But I think luck followed us here to Houston too. When we were coming here, a friend of my husband told him that his course mate, also retired from the army, was also living in Houston and we must touch base with him once we reach here. That's how we met this amazing group of people here. At their house we were introduced to a few more couples. The common factor that connected us all was that each one of them had some connections with the Indian army, having served in it at some time or other. Most of the spouses too were army brats like me. It is difficult to meet like minded people especially as you grow older but luckily for us we found ourselves connecting with them on the same wavelength.
It does take time to build a relationship but I must say we are definitely on our way !!
We meet occasionally at our homes for a fun evening. Most of  the times we hold a  potluck so that it is not too much of a burden on the host, as unlike India there are no maids and everything has to be taken care of by yourself. 
For the get together this month, I was assigned a dessert and I decided to take along an Apple pie. Generally I like to make a short crust pastry for making the pie crust, but this time I decided to do a flaky pastry. Surfing the net, I hit upon King Arthur's recipe of double crust for pies. It was the perfect choice as the crust on baking was crisp and buttery and there was no blind baking needed. Also usually while making the filling for an Apple pie, I  like to cook my apples a bit. This way not only is the filling thick and gooey but it also helps to lessen the gap between the crust and the filling, since the apples shrink considerable on baking. Another benefit is that you can make the filling in advance instead of sweating over it all on the same day.
To give an extra crunch to the pie I added a cup of dried cranberries and 1/2 a cup of roasted almonds which really helped to boost the flavour of the apple pie.

Ingredients
Crust (adapted from King Arthur's Flour double crust pie)
21/2 cups All purpose flour
3/4 tsp salt
1 cup cold unsalted butter (if using salted butter reduce salt to 1/2 tsp)
1/4 to 1/2 cup ice water
Filling

8 cups peeled, cored and sliced apples

1 cup dried cranberries

1/2 cup sliced roasted almonds

2 tablespoons lemon juice

3/4 cups brown sugar

2 tbsp. cornstarch
1 tsp cinnamon powder
1/4 tsp all spice powder
2 tbsp. butter, diced in small pieces
1 egg for glazing the top

Method
In a medium bowl whisk together the flour and salt. Dice the butter into small cubes and work it into the mixture, gently rubbing it with your fingertips until the butter is well distributed but not fully incorporated. Small pea size  butter flakes will be left behind.
Add the chilled water, 2 tablespoons at a time, mixing it in gently. When the dough is moist enough and starts clumping together, gather the dough into a ball.
Divide the dough in half and pat it into two disks.
Wrap in plastic and refrigerate for 30 minutes before rolling.


To make the filling:
Combine the sliced apples, lemon juice and sugar in a pan. Cook on low heat for 5-10 minutes just till the apples start to soften. Cool slightly.
Add in the cranberries, roasted almonds, cornstarch, salt and spices and stir in the apple mixture till fully coated.
Lightly grease a 9-inch pie.
Roll out half of the pastry into a circle big enough to cover the base of the pie dish and is hanging over the edge of the dish. (I like to roll my pastry in between  two sheets of cling film which really makes it easier to roll without sticking to the surface) Check out my post on Quiche Lorraine here for some easy rolling tips.
Preheat the oven to 425F.
Spoon the apple filling onto the lined pie dish. Dot with the diced butter.
Roll out the remaining pastry to an 11" circle. Cut decorative vent holes. If you are feeling a bit more adventurous weave a lattice over the apples. Check out my post on Cherry Pie if you want to learn how to decorate a pie with a lattice on top
Roll the overhanging crust up and over the top crust pinching the upper and lower crust with your fingers to seal the two together. flute the edges of the pie, then place it in the refrigerator for 10 minutes to chill the pie before placing it in the oven.
Glaze the top of the pie with an egg wash. Sprinkle some granulated sugar on top for adding an extra crunch.
Bake the pie for 20 minutes at 425 F, then reduce the temperature to 375 F and bake for 40 minutes more until the filling is bubbling inside. If you feel the edges of the pie browning too quickly cover them with a foil.
After the pie is done, remove it from the oven and cool it completely before slicing. The filling will continue to thicken as it cools.