Pages

Showing posts with label Appetizers. Show all posts

Tuesday, 19 April 2016

Mixed Vegetables Fritters (Pakoras)

Nothing can be more blissful on a rainy day than to be curled up in your bed, reading a book while sipping a steaming hot cup of tea and a crunchy snack to munch on.
Ideally a bowl of peanuts or chips would suffice for me but today I decided to be a bit naughty!!
Normally I resist anything deep fried but today all my resolutions went out of the window and I decided to make mixed vegetable fritters/pakoras to have with my tea. I know even if I breathe air, it all goes and settles down on my hips but what the hell, once in a while it is okay to throw caution to the winds, put down your guard and indulge in the things you enjoy!! 
These pakoras are an all time favorite snack in India - extremely simple to make and truly delicious.They are also popularly known as bhajiyas. There are endless variations of making these pakoras. This recipe calls for potatoes, onions and spinach but you can also make them with eggplant slices, cauliflower florets or jalapenos. My favorite is green chillies stuffed with potatoes - really makes the smoke come out of your ears but oh!! it is so worth it.
You can easily find the chick pea flour, also called 'besan' or 'gram flour' in any Indian or South Asian grocery store.  .
Serves 4-6
Ingredients
  • 1 cup potato, peeled and cut into small pieces
  • 1 cup packed spinach, roughly chopped into small pieces
  • 1 cup onion, finely chopped 
  • 1 cup chickpea flour/ besan
  • 1 tsp cumin seeds
  • 2 tbsp chopped fresh coriander leaves
  • 1/2 tsp salt 
  • water as required to make a slightly thick batter (i used about about 1/4 cup)
  • oil for frying

Heat oil in a medium sized saucepan till hot. (You can also insert a deep fry thermometer till it reads 300.
In a bowl combine chickpea flour, cumin seeds, salt and 1/4 cup water and stir for 3-4 minutes till you form a smooth batter.
Stir in the potatoes, onions and spinach leaves.
Working in small batches, drop about 2 tsp- size amount mixture into the hot oil, turning as needed until golden and crisp, about 5-6 minutes.
Repeat this process till all the batter is used up.
Using a slotted spoon, transfer the pakoras to paper towels to drain.
Serve hot with tomato sauce or coriander chutney and don't forget your cup of tea!! 

Sunday, 13 July 2014

Healthy Spring Rolls - The Airfryer Way!!

There is good news for all of us sweating out there - the Monsoons finally seem to have arrived!! 
I know it must have have brought big smiles and a great sense of relief to all the Delhi people, who have by now had just about enough of the unending sweltering heat the last few days, which obstinately was refusing to simmer down its scorching temperatures. We will think about all the problems that the rains brings along with it later, but for the time being lets revel in the moment and enjoy the cool air and the beautiful change of season.
Come monsoons and your taste buds automatically start craving for hot and spicy fried foods -  a plate of hot pakoras accompanied perfectly with a steaming cup of tea tempts you to throw caution to the winds and makes even the strongest of us forget all resolutions about losing weight. But not with this recipe. You can actually have your cake and eat it too. 
Can you imagine hot, crispy spring rolls without a drop of oil? Don't believe it? It is actually possible with Philips Airfryer which is basically a multi-cooker that lets you cook food without the need for oil. The Airfryer has 'Rapid Air Technology" which uses circulating hot air and a grill element to cook the food evenly without the need of vegetable oil. Now you actually don't have to worry yourself sick about the amount of oil you have consumed when indulging in your guilty pleasures and most importantly without compromising on the taste. It is a win-win situation!!
If you want to know what more you can do in the Philips Airfryer, you can check out my earlier posts - "Healthy oil free Gujiyas" and "Papaya and Jaggery cake".
Atleast I am totally smitten with the Airfryer. I find that it is not just another gadget which will occupy space on your kitchen cabinet and lies forgotten, but it actually delivers what it promises. It is perfect for those of you who are health conscious and and want to keep the use of oil to minimum. You will be surprised how quickly it cooks things with the least amount of effort. Start eating the healthy way with the Airfyer, make it your way of life too and I can assure you that like me, you too will fall in love with it.
So now, you no longer have to say no to your favorite fried food !! Just go ahead and indulge yourself and enjoy  the flavor of these monsoons with your favorite crispy fried snacks without an iota of guilt.
Ingredients:
1 packet of Spring Roll Wrappers - thawed if frozen (Try in a supermarket or even your nearest department store- you will be surprised how easily available they are now)
1/2 cabbage - sliced in thin strips
1 small carrot julienned
1 onion, finely sliced
1 tsp finely chopped ginger
1 spring onions, finely sliced lengthways
200 gms boneless chicken breast, sliced into thin strips
1 tbsp oyster sauce
1 tbsp light soy sauce
2 tbsp cornflour
salt and pepper to taste
Method
Heat 1 tbsp oil in a pan till smoking. Add the cabbage, carrots, onions, spring onions, and ginger. Saute the vegetables quickly on very high heat for 1-2 minutes. Add the salt, pepper, oyster sauce and soy sauce. Be careful not to overcook. The vegetables must still have a crunch. Remove from heat and keep aside to cool down.
In the same add the chicken and stir fry for 3-4 minutes. Season. Stir in with the vegetables till well mixed and keep aside to cool.
Make a thick paste of cornflour with 1 tbsp water.
These are the spring roll sheets I got and that too most surprisingly from my local supermarket. There were over 20 sheets in one packet. You need to thaw them to room temperature before separating the sheets. The great thing about this spring roll wrapper is that what you don't use you can throw them back in the freezer to reuse.
Peel your spring roll wrapper off and lay down one sheet on the surface like a diamond as shown..Cover the unused wrappers under a damp cloth as they dry off very quickly. 
Divide the filling into equal portions. Place some filling on one corner of the wrapper.
Roll tightly and when you are about halfway stop and fold in the opposite corners towards the middle so it looks like an envelope. Brush each corner with the cornflour paste.
Roll the pastry tightly towards the top corner.
Repeat with the remaining spring roll wrappers and fillings.
Place them seam side down (helps secure the corner so that the corners don't open). keep the rolls covered under a damp cloth.
Heat the Airfryer for 10 minutes @ 200. Brush the rolls with oil and place in the Airfryer basket.Cook for 5-8 minutes or till golden and crispy. You will be seriously impressed how crispy these spring rolls turn out to be and that too without oil.
Cut into smaller pieces and serve hot.
Some important Tips (from the net)
  • The best way to defrost a spring roll wrappers : overnight in the refrigerator or keep out on the counter for 30 minutes.
  • once the wrapper are defrosted,, open the package and immediately cover with a barely damp towel. The wrappers will quickly dry out and get cracked if left out in the open uncovered.
  • if the wrappers  dry out and are stiff, you can put a few wrappers on the plate, cover with a damp towel and microwave on medium for 10 minutes. The wrappers will soften up.

Sunday, 16 March 2014

'Holi Bites' - Healthy Oil Free Gujiyas And Namakparas with Philips Airfryer

It won't be wrong to say that Philips Airfryer is full of hot air !! Literary speaking of course.
The Airfryer uses an unique patented combination of high-speed air circulation, with a top grill, called Rapid Air technology. The Rapid Air technology makes the hot air circulate very rapidly around the ingredients in the basket. This heats up the ingredients in the basket from all sides at once, making it a healthy, fast and easy method to prepare tasty food. 
Food prepared in the Airfryer is deliciously crispy on the outside, without being dry on the inside. As the basket is confined within the base pan, the hot air circulates within this space cooking the food with its own fat in the process hence minimising the need for using oil.
Conventional deep fat fryers use oil to heat the food and create the crispy layer. The airfryer does not need frying oil. The food is only heated by the circulating hot air. When you air fry French fries, the fries prepared contain up to 80% less fat compared to fries prepared in a deep-fat fryer. When you prepare homemade French fries, the fat percentage can get as low as 1.5%. It also has air filters so your whole house does not smell of the food that you are frying.
Philips Airfryer is the latest gadget which has taken the market by storm, appealing to the health conscious customers because of its claims of cooking food with upto 80 percent less fat.
Having heard so much of this revolutionary product I had to see it for myself what the hullaboo was all about. Was it just another gimmicky kitchen gadget which will end up taking space and gathering dust on your kitchen counter or would it actually hold up to its promise? So, when someone on behalf of Philips contacted me to review their Airfryer I thought to myself, "Why not ?" After all I have been planning to buy the product ever since I was introduced to it at an event held by Philips 'Foodathon'. Its just that I haven't been able to convince myself till date if it is really worth investing in another voluminous food gadget. 
The Philips Airfryer arrived 2 days back. I think the person who was most excited about it was my son who loves to experiment in the kitchen and needless to say, his exams having gotten over the same day, he was the first one to try his hands on it. He made seekh kebabs with absolutely 0% oil. I was quite delighted with the outcome. The seekh kebabs were nicely browned and cooked to perfection without a hint of being dry - which was contrary to what I was expecting.
With one successful experiment done, I thought why not try out my Gujiyas and Namakparas for this Holi in the Airfryer, instead of frying them in oil?  I was quite impressed with the results as both the Gujiyas and the Namakparas came  out nice and crisp and 'Khasta' like I would have liked them to be. Its amazing just to think how much consumption of oil I will be able to reduce in my everyday usage of the Airfyer. Its absolutely hassle free to use and the best part is that it is even safe for the kids to operate without any fear of untoward accidents happening. It looks like a large rice cooker with a squarish basket which you can remove to place your food inside. And contrary to what I had thought the basket is not all that small. It is a okay size. But the thing is that it cooks so quickly you can easily do two batches in a jiffy. You can put about 800 gms of frozen chips at one go which cooks in 12 minutes. Just ensure that you shake the basket halfway. 
Now that the Philips Airfryer has roused my interest, I will be experimenting a lot more with this unit. So watch my space for some more Airfryer recipes. It is definitely a much more healthier option and in today's world with all the health worries surrounding us, I think it is a wonderful way for enjoying all those snacks which we had kept away from because of being deep fried.
So what say you, ready for a plate of hot Samosas or some scrumptious Gujiyas?


Gujiyas
Ingredients
Maida - 100 gms
Ghee - 15 gms
Khoya - 100 gms, grated
Cashewnuts - 10 gms, chopped
Raisins - 10 gms
Powdered sugar - 80 gms
Green cardamom powder - 5 gms
oil for brushing
Method
Rub the flour and ghee together till they resemble breadcrumbs. Add water and knead into a stiff dough.
For the filling mix grated khoya, cashewnut, raisins, cardamom and sugar in a bowl.
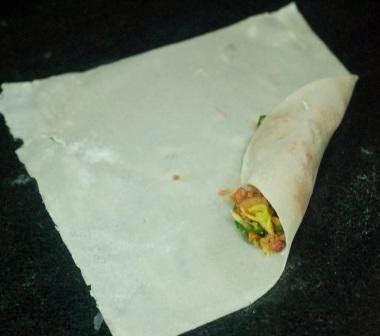
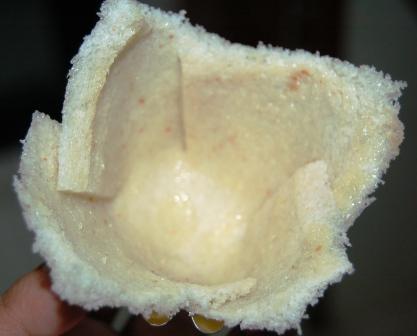
Divide the doughinto equal portions. Roll out thin rounds of dough. Place them on the gujiya mould. Brush the edges of the mould with plain water. Place a spoonful of the filling in the middle of the mould and press together the edges of the mould. Remove the extra dough. Open the mould and remove the gujiya. 
Preheat the Airfryer at 180 degrees for 5 minutes.
Brush the gujiyas with oil. Arrange the gujiyas in the Airfryer and air fry for 12 minutes or till golden brown.
NamakParas - (Basic recipe adapted from Sanjeev kapoor)
Ingredients
Maida - 1 cup
Semolina (suji)- 1/4 cup
Ghee - 1/4 cup
Ajwain- 1/2 tsp 
Salt - to taste
Method 
Mix the maida and the suji. 
Add ghee and rub in with your fingertips till the mixture resembles breadcrumbs. Add salt and crushed carom seeds. Add sufficient cold water to make a stiff dough. 
Cover the dough and let it rest for 30 minutes. 
Sprinkle some refined flour on a surface and roll out the dough into half a centimeter thick disc.Cut the rolled dough into diamond shaped discs.
Preheat the Airfryer at 180 degrees for 5 minutes.
Take out the tray from the Airfryer and place the namakparas on the tray and air fry them for 8 minutes or till golden brown.
First time I just placed enough to cover the bottom of the tray as I wasn't too sure how they would turn out. But for my second attempt I stacked them on top of each other. Just ensure that you shake the basket halfway to get them evenly cooked.

Now go ahead and enjoy your snacks without feeling guilty or compromising on the taste. 

Enjoy and have a wonderful time on Holi.

Monday, 5 August 2013

Gougeres filled with chicken salad

Don't be fooled by its fancy name. I know the name sounds quite a mouthful but Gougeres are nothing but a French style of savory pastry made from choux pastry mixed with cheese. Yes, this is the same pastry, only savory, used to make those melt-in-the-mouth cream eclairs and profiteroles, which I still can't resist if put before me. The secret of making this pastry wonderfully light and airy is generally mixing of the eggs nicely into the dough one at a time, until each egg is fully incorporated into the batter before adding the next. Also these Gougeres freeze well. So you can make a few extra, cool them completely, cover them with a plastic wrap and freeze them until firm. Possibilities for filling are limitless right from chicken to fish to mushrooms to spinach. I leave that too your fancy. Serve them without a filling and they can be an excellent alternative to dinner rolls. I love serving them as appetizers - warm, cheesy and just the perfect size to pop into your mouths.
Ingredients - (This recipe has been loosely adapted from Michael Roux's Choux Pastry)
125ml milk
125ml water
100g butter diced
1/2 tsp salt
1 tsp caster sugar
150g plain flour
4 eggs
eggwash (1 yolk mixed with 1 tbsp water)
1 tsp chilli flakes
1 tbsp dried oregano
1/2 cup grated cheese
Method:
Combine milk, water, butter, salt and sugar in a saucepan and beat over low heat.
Bring to a boil and immediately take the pan off the heat.
Shower the flour in and mix vigorously with a wooden spoon till thoroughly mixed and completely smooth. (Don't worry if the batter separates and looks curdled at first. Keep beating, and it will come together nicely.)
Return the pan to medium heat and stir continuously for about 1 minute to dry out the paste and then tip it into a bowl.
Add the eggs one at a time, beating with the wooden spoon making sure that each egg is fully incorporated before adding the next egg.
Once the eggs are all incorporated, the paste should be smooth and shiny with a thick ribbon consistency. Stir in the chili flakes, dried oregano and the grated cheese and stir till mixed well.
It is now ready for use.
Put the paste in small piping bags fitted with 1 cm nozzle - I just used a spoon to drop the paste into a baking tray.
Pipe small mounds in staggered rows onto a baking sheet lined with grease proof paper.
Brush the choux pastry lightly with egg wash.
Bake at 180C for 15-20 min till the outside of the bun is dry and crisp but the inside is still soft.
cool on a wire rack.
For the Filling:
2 chicken breasts, cooked and diced
2 tbsp mayonnaise
2 tbsp onions, finely chopped
1 tsp mustard sauce
3 tbsp pineapple, finely chopped
2 tbsp walnuts, roughly chopped.
To Assemble:
Mix all the ingredients for the filling together.
With a serrated knife cut each of the gourgeres in half lengthwise (I was a little impatient and just poked a hole on the top. I think I will be more meticulous next time for a neater look).
Fill each one with a spoon of the chicken filling.
Serve immediately.


Thursday, 1 August 2013

Sticky Bacon Wrapped Sausages

These sausages are wrapped in bacon and baked with sugar and spice and just about everything nice. I suggest don't attempt to make these little little devils as just one little bite and you are totally addicted to them. I had them a few weeks back at Italiano, a quaint little Italian restaurant in Nathupur, which is tucked way back in the bylanes of DLF phase 3, Gurgaon, and they have been stuck in my head ever since. I finally got a chance to have a go at making them, when a few friends dropped by for lunch last Sunday. Sweet and sticky, with a delicious flavor from the bacon, these sausages were quite a hit with our guests making me regret why didn't I make a few extras. They would have made a great snack for times when the midnight monster strikes you - a la Nigella Lawson style!!
You too go ahead and indulge yourself in this super easy recipes and don't forget to make those few extras ones.
Ingredients
1 packet bacon
1 packet cocktail sausages (I used the regular sausages and cut them in half)
4 Tbsp brown sugar
4 Tbsp Maple syrup

Method
Preheat oven to 200C. 
Cut the bacon into thirds.
Line a baking tray with an aluminium foil. (Since the brown sugar glaze is sticky, lining the tin with foil makes it much easier to clean up later. I assure you your maid will thank you for doing this).
Tightly wrap a third of a bacon around one sausage and secure the end with a toothpick.
Place it seam side down onto the prepared baking tray.
Repeat with the remaining bacon and sausages.
Drizzle maple syrup over the sausages making sure that each sausage is evenly covered.
Sprinkle brown sugar over the sausages.
Bake them for about 35-40 minutes till the sausages are golden brown and the bacon is crisped.
Cool for 4-5 minutes before diving into this sticky heaven!!


Monday, 22 July 2013

Toasted Ravioli

Ever heard of toasted Ravioli? Imagine biting into hot crispy pasta filled with minced meat and melting mozarella cheese, rolled in bread crumbs, deep fried and then have it dipped in marinara sauce!! Sounds unfamiliar, doesn't it? I too had never thought of ravioli in this form. But believe me this is the yummiest pasta can ever get!!
Toasted ravioli is an appetizer which was created and popularized in St. Louis, Missouri. Generally, some type of meat or cheese is wrapped in a square ravioli, breaded and deep-fried until the pasta shell becomes crispy and golden brown. Of course you can bend the rules, like I did and made a round ravioli shape as I found it easier, and the choices for the filling can be varied according to your choice. These breaded pasta pockets make a delicious hot finger food that can be snacked on at any time of the day.

For the Ravioli
11/2  plain flour
2  large eggs
1-2 tbsp water
1 egg beaten slightly
a pinch of salt
For the filling
300 gms minced meat (keema)
Salt and pepper to taste
1 tbsp dried rosemary
2 onions, finely chopped
1 tsp garlic, finely chopped
2 tbsp tomato puree
50 gms Mozzarella cheese, grated 
To Serve
1 cup flour, seasoned with salt and pepper
 1 egg beaten
 Vegetable oil for frying
To prepare the Mince meat filling:
Thoroughly wash the mince meat and put in a pressure cooker with 1 ½   cups of water.
Add ½ tsp salt and pressure cook on high for 5 minutes. 
Then lower the gas, and simmer further for 10-12 minutes.
Remove from heat and keep aside till the pressure is released.
In a pan, heat oil and fry the onions till lightly browned. 
Add in the chopped garlic and cook for a further minute.
Add the tomato puree and the dried rosemary and boil the minced meat till the water dries up. 
Check for seasoning.
Cook for 5-7 minutes more till the meat is nicely browned.
Add the grated cheese to the meat mixture and mix thoroughly.
Keep the filling aside.
  To make the Ravioli
In a food processor, combine and process flour, eggs and salt till well mixed. If needed, add 1-2 tbsp water until mixture forms a dough.
Remove dough and shape into a ball. 
On a lightly floured surface, knead dough about 1 minute or until smooth. 
Wrap dough in plastic wrap and let stand for 30 minutes.
Divide the dough into four portions. 
On a lightly floured surface, roll into small discs or just roll out into a big sheet, then with the help of a cutter cut round shapes.
Brush the discs lightly with beaten egg. This will help form a seal.
Fill the ravioli by dropping the mince meat in the center.
Cover the ravioli filling with another round disc. 
Press down firmly on the top to seal the edges around the filling.
Repeat with the remaining dough and filling.
Now roll the ravioli in the flour and shake off any excess.
Then dip the floured ravioli in the beaten egg, making sure it is completely covered in the egg.
Once again dip the ravioli in the flour
Heat oil in a pan. 
Fry the ravioli in batches turning until golden brown and crispy.
Using a slotted spoon, transfer the ravioli to paper towels to drain. 
Sprinkle with extra cheese. 
Serve hot with marinara sauce

Monday, 15 July 2013

Crispy Lotus Stem with Honey Chilly

Of late, this show called 'World Kitchen' on NDTV Good Times has caught my fancy. It has a host of professional chefs taking us on a gastromic journey across the globe. Last week,  Executive chef Sahil Arora from Courtyard by Mariott, New Delhi showed how to make Crispy Lotus stem with honey chilli. Both my kids being extremely fond of chilly potatoes I quickly jotted down the recipe making a mental note to try it out the very next day itself. The dish was not only amazingly simple to make but it was outstanding in taste too. For all the health conscious people out there you will find a whole lot of health benefits from lotus stem as it is rich in calcium, iron and dietary fibre.
 Lotus stem is not new to Indian cooking but this is one variation that will definitely have you asking for more. This avatar of lotus stem was totally new to me - crispy and crunchy with the sweet and spicy flavors exploding in your mouth. Kids loved it asking for more. My son even declared it to be better than his favorite chilly potatoes calling these much more crunchier, which is quite a compliment for me. As it is seeing your kids relish a dish made by you (especially one that you don't have to slog over) completely makes your day!! 
So, for all those who haven't as yet had a taste of this wonderful vegetable, this is one great way to start on it.

 Ingredients
Lotus stem - 200 gms  –sliced diagonally into wafer thin slices 
Whole dry red chili - 3 to 4
Honey - 2 tsp
Tomato ketchup - 2 tsp
Soy sauce - 1/2 tsp
Vinegar - 1 tsp
Chili paste - 1/2 tsp
Roasted sesame seeds - 1 tbsp
Spring onions -  2 tbsp
Cornflour - 2 tsp
Salt to taste
Oil for frying

Method
Soak the sliced lotus stem in a bowl of water for about half an hour. This will help to get rid of the mud.
Scrub it clean and wash thoroughly under running water.
In a bowl place the drained lotus stem and sprinkle with 2 tsp cornflour.
Mix it in thoroughly to coat it nicely.
Heat oil in a pan and fry the lotus stem till it is light golden brown and crispy.
Drain in a bowl lined with paper to drain the excess oil
Next take 2 tsp oil in a pan. 
Break and add 2 whole red chillies and fry them for a couple of seconds.
Add 1 tsp minced garlic and saute till lightly browned.
On a low flame, add 1/2 tsp chilli paste, (I didn't have chilli paste available so I just added in a tsp of Hot and Sweet Maggi tomato sauce) and 2 tsp honey and 2 tsp tomato ketchup. 
Stir and cook the sauce for a few minutes. 
Add the soya sauce, vinegar and the salt and mix.
Add in the fried lotus stem and toss on high flame till they are nicely coated with the sauce.
Garnish with diced spring onions and toasted sesame seeds.
Serve immediately.


To make the chilli paste at home - oven roast a handful of red chillies. Crush them coarsely in a grinder. Mix the ground chilies with 2 tbsp of garlic and fry them in 4 tbsp oil till golden brown (oil helps in preserving the paste). Add a sprinkle of soy sauce,1/2 tsp sugar and salt and mix thoroughly. This paste can be kept in the refrigerator for a 3-4 weeks.


Wednesday, 10 July 2013

Keema in Bread Cups


Feeling hungry kya? Try out these quick and easy appetizers made from bread to keep your hunger at bay. These buttery toasts of white bread take the place of pastry in this savory keema recipe. Bread is such an item which is always there in each and every household and is liked by children and adults alike. These bread tarts, which can be whipped up in a jiffy will not only fulfill your youngsters need for a quick snack but is also great to serve as an appetizer when you have guests over. I have used minced meat in this recipe but you can go ahead and experiment with any filling of your choice - mushrooms, paneer, potatoes, chicken, stir fried vegetables, there are numerous options to suit your taste buds. For an healthier option, you can even use brown bread to make the 'tart' shells. These bite-sized tarts can be enjoyed both as an appetizer and a main meal.

Ingredients
300 gms lamb  mince 
1 packet Maggi bhuna masala
Salt to taste
8 slices fresh bread
½ egg, beaten
¼ cup mozzarella cheese,grated
2 tsp dried oregano
Method
To prepare the Keema filling
Thoroughly wash the mince meat and put in a pressure cooker with 1 ½   cups of water.
Add ½ tsp salt and pressure cook on high for 5 minutes. 
Then lower the gas, and simmer further for 10-12 minutes.
Remove from heat and keep aside till the pressure is released.
Open the cooker lid and add in 1 packet of  Maggi bhuna masala and boil the keema till the water dries up. 
Check for seasoning.
Cook for 5 minutes more till the meat is nicely browned.
 Keep the filling aside.

To make the bread cups
Preheat the oven  to 180 C.
                            

Remove the crust from all the bread slices.

Roll the bread slices flat with a rolling pin.

Make 4 small cuts on each edge of the bread.

Butter both the sides of the bread.
Press the buttered slices into greased tart shells.

Trim the edges with kitchen scissors so that the bread fits the tart shell nicely.
Sprinkle a little salt and dried oregano on the base of the cups.
Bake the bread cups for 10 -12 mins until the basket gets crispy. Set aside.


Assembly:
Add the beaten eggs in the cooked keema and mix well.
Fill each basket with the mixture. 
Sprinkle grated mozzarella cheese on the top.
Place back in the oven to bake further for 5-7 minutes or until the cheese has melted.

Serve hot.