Pages

Showing posts with label Celebration Cakes. Show all posts

Tuesday, 1 September 2015

Decadent Chocolate Cake with Buttercream Frosting.....and celebrating Rakhi!!

No celebration in our house is complete without a cake whatever might be the occasion. 
Yesterday we celebrated the festival of Raksha Bandhan (or Rakhi as it is popularly known) in our house and it goes without saying that there had to be cake and that too without question a chocolate one!!
The festival of Rakhi is a traditional Hindu festival celebrated with great enthusiasm across India. It symbolizes the unconditional love and bond between brothers and sisters. In this festival, the sister ties a colorful thread on the wrist of her brother, praying for his long life and he in turn vows to protect her from all troubles. 'Raksha' means protection and 'Bandhan' means ties, thus the name Raksha bandhan. Its a very sentimental occasion, full of love and emotion and an opportunity for the families to get together and celebrate, wear traditional clothes and prepare special dishes. Of course, for some who are not able to meet, sisters make sure that the Rakhis are mailed to their brothers so that they can reach on time and their brothers can wear the thread of love send by their sisters on the auspicious day. 
photo source: internet
For me too, Rakhi was a much awaited occasion and was always celebrated with great enthusiasm. We got new clothes and mom always prepared a special fare for us to feast on. 
I got to tie Rakhi to my twin elder brothers. I know some of you might be thinking, how lucky I must be to have twin elder brothers to protect and look after me but when younger I thought otherwise. Though I love them both intensely, at that time, I thought having twins for brothers wasn't exactly all that great. 
I was so envious of them as being twins they always had each other for company and I was perpetually ignored and pushed away most of the time especially being younger by 31/2 years. Also being a girl it was automatically decided by my brothers that I was useless and didn't know anything.  Twins have a certain affinity and closeness and when together they need no other companion around. Because of these very reasons, I used to pester my mom all the time that why I too couldn't have a sister to play with. 
Even when we got into a fight (which was often), it always used to be them against me. Though I wasn't one to give in easily and gave it my all in the battlefield - pulling hair, biting and kicking anything to give me a upper hand.
I used to follow them relentlessly everywhere they went and wanted to be included in whatever they did or played. Poor guys!! Now that I actually come to think of it, it must be pretty embarrassing for them to have a little sister tagging along with them all the times and inspite of their best efforts to throw me off their trail, I used to be like their shadow. (Maybe things would have been different, if in those times time we too had video games and internet to distract me!!) To make matters worse, I was my dad's pet and whatever mischief or untoward incident happened that was supposed to be kept hushed, was promptly rattled off to him on his coming home from office. Gosh!! I must have been a total pest and what a tough time I must have given my poor brothers!! No hard feelings Bros!! I totally understand it now and genuinely feel really sorry for you guys.
I must say, inspite of all my complaints and feeling sorry for myself, I have had some really wonderful times too to look back on. I remember as a child, travelling on the train in the first class compartment was always so much fun, never a dull or boring moment, playing cards and jumping from one berth to another. At home, we used to keep busy playing board games together for hours (of course it usually didn't end nicely whenever I lost or got out), with them I learnt to climb the toughest of trees, I still remember as a 9 year old, how we would walk up the mountains in 'Khunmoh' in Srinagar from one army post to another, a little later when dad was posted in Bareilly, going for cycling together to the swimming pool and also for horse riding early in the mornings, playing 'pittuh' on the road and hide and seek and dark room whenever there was a power cut!! My love for playing games and outdoor sports began early on in life and you know by now whom do I have to thank it for. What lovely treasure troves of childhood memories to cherish!! 
We also had great fun planning for festivals, during Dussheras collecting things to build our own effigy of 'Ravana' and filling it with crackers, then waiting with excitement to light it up at night, planning for 'Holi' days in advance and then getting up really early in the morning to fill water balloons and buckets with colored water so that we could all hide near the gate and target unsuspecting passer-bys, cracking  loads of crackers at Diwali and competing who had the courage to burst the most dangerous one. God!! such sweet memories and they will always remain precious to me.
Having elder brothers has taught me for one thing to be strong and confident and never to take any nonsense from anyone and most important to feel that nothing really is impossible even if you were a girl!! Luckily for me my parents treated me no less than my brothers and I was not stopped to do anything or go anywhere. 
Now each one of us has got busy with our lives and responsibilities with everyone staying in different parts of the country. Over the past few years, there have only been a handful of occasions, when I have tied Rakhi to my brothers personally. But inspite of the time and distance, I want both of you to know that you are missed terribly and I will always have all my love and prayers for your long and healthy life!!
What better occasion than Raksha bandhan to reconfirm our love and special bond. I feel blessed to have you as my brothers and the blessing has increased manifold as now I have two lovely sister-in-laws whom I get along with like a house on fire. I think its God's way of imparting justice to me and finally giving me sisters which I always longed for!!
My son and daughter celebrating Rakhi 
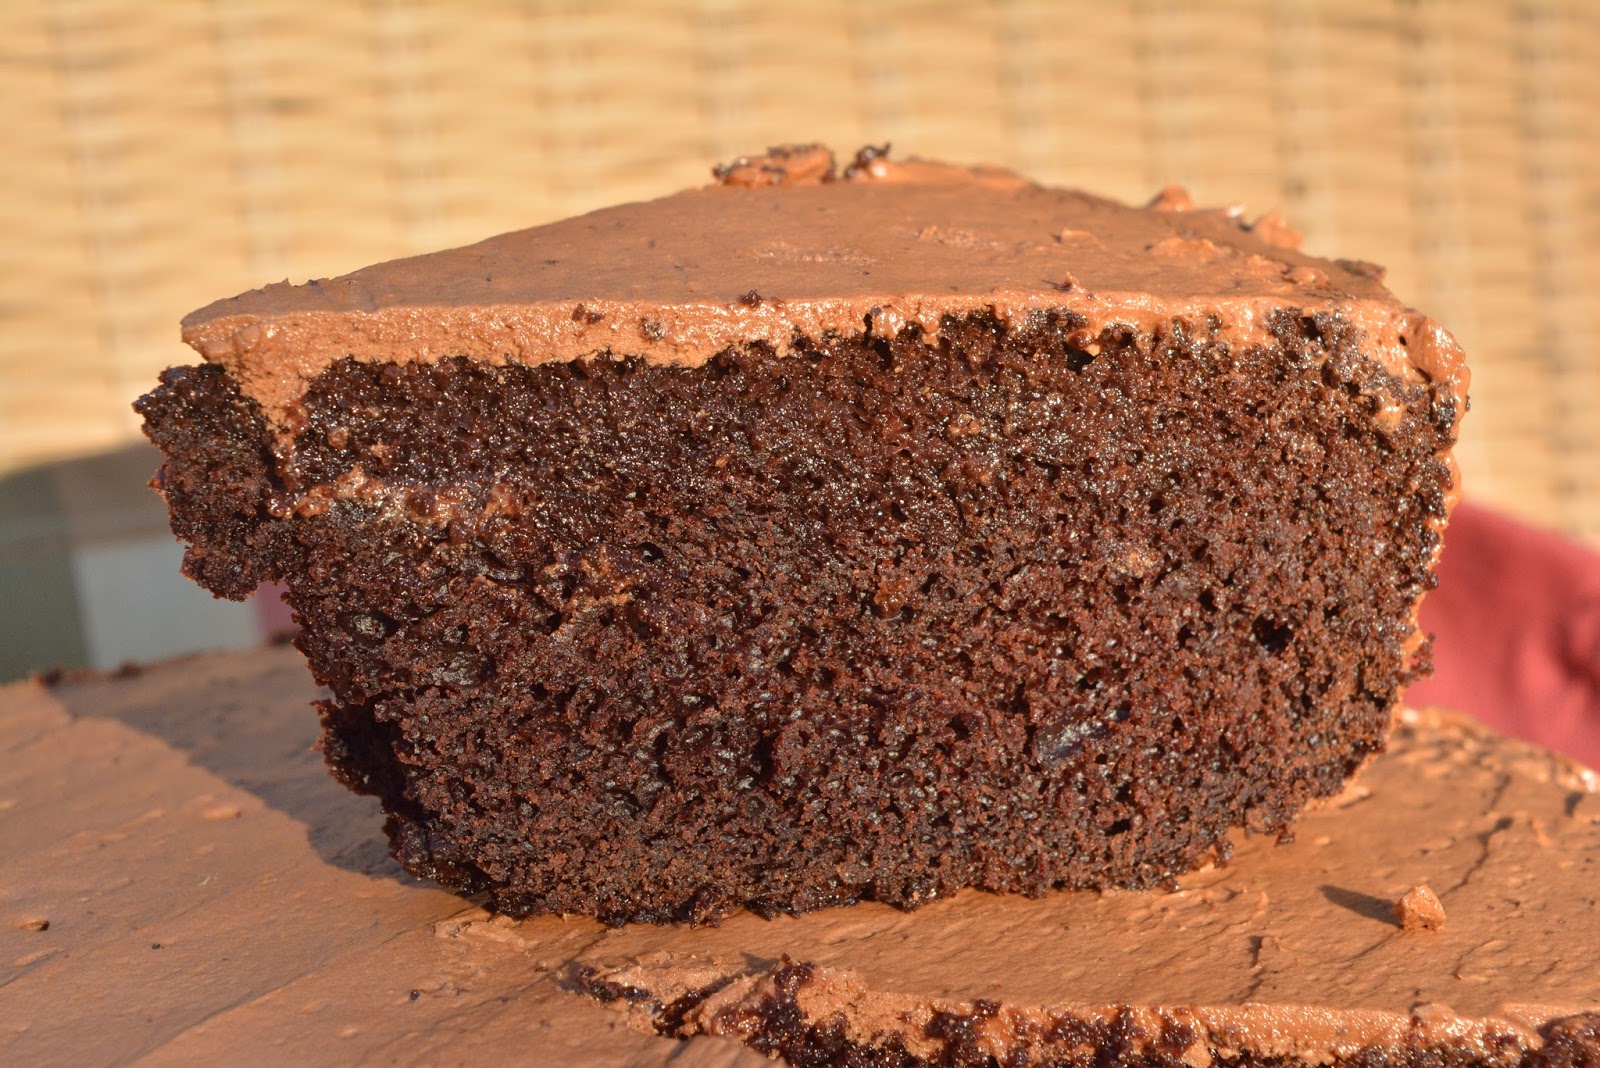
To commemorate the auspicious occasion of Rakhi I made a chocolate cake for my kids.  Its a rich, beautifully moist and utterly decadent, infact the best chocolate cake I have tasted!! Truly a special treat for a special occassion.
Ingredients
For the cake
2 cups all purpose flour
2 cups sugar
3/4 cup unsweetened cocoa
2 teaspoon baking powder
2 teaspoon baking soda
1 teaspoon espresso coffee powder
1/4 teaspoon salt
1 cup milk
2 tbsp vinegar
2 large eggs
1 cup boiling water
1 tbsp vanilla essence
For the Chocolate buttercream frosting (enough to cover and fill a 9" cake)
11/2 sticks (170 gms) unsalted Butter softened
1/2 cup unsweetened cocoa
21/2 cup confectioners sugar
2 tbsp milk
1 tsp vanilla extract
1/2 tsp coffee powder 
Method
Preheat oven to 350 F. 
In a large mixing bowl sieve together the flour, sugar, cocoa, baking powder, baking soda, salt and espresso powder or put the ingredients in a bowl of a stand mixer and whisk using your paddle attachment, on low speed until well combined.
Add milk, vegetable oil, eggs, vinegar, and vanilla essence to the flour mixture and mix together on medium speed until well combined. 
Add in the boiling water and whisk till thoroughly mixed.
Don't worry if at this point your cake batter is looking too runny. Avoid the temptation to add in more flour. Trust me!!
Pour the batter in a greased 9" spring form pan.
Bake for 40-45 minutes or until a toothpick inserted in the middle comes out clean.
To make the icing
Add cocoa and the softened butter to a large bowl.
With a hand mixer mix thoroughly for 1-2 minutes till it reaches a smooth consistency.
Add in the sugar, vanilla and milk to cocoa mixture and mix thoroughly with the hand mixer on low speed. Turn the speed on high and mix for about a minute till the consistency is smooth and creamy. Make sure there are no lumps in the batter.
If the batter appears thin add in some more confectioners, spoon by spoon until it reaches the right consistency.

Sunday, 15 February 2015

Love is in the air.....Celebrating Valentine's Day with the classic Red Velvet Cake

                            
Love not me for comely grace,
For my pleasing eye or face,
Nor for any outward part:
No, nor for a constant heart!
For these may fail or turn to ill:
Should thou and I sever.

Keep, therefore, a true woman's eye,
And love me still, but know not why!
So hast thou the same reason still
To dote upon me ever
                                       - John Wilbye

Celebrating love is such a beautiful feeling and Valentine's Day makes it the perfect time to express our love to your family, friends and someone you love in the most special way. February 14 is known as Valentine's Day, Saint Valentine's Day or the feast of Saint Valentine and is celebrated in every corner of the globe. Come February and a million ways to express your love are almost pushed into your face- heart shaped balloons, heart shaped chocolates, flowers, cards, special valentine menus at restaurants all trying to seduce you in toasting your love for that 'special someone' in the most unique way. 
Some of us also see this day as majorly overrated, overpriced and over-hyped - a money making propaganda by most business institutions trying to cash in on peoples sentiments and commercializing the concept of love. Its no wonder that V-Day brings with it unattainable expectations.
Valentines day sure can feel lame if you surround yourself with these feelings. I agree with most people that why need a special day to express your love- shouldn't it happen every day?
Then on the other hand, I feel why not go with the flow. There is nothing wrong in celebrating a day of love, pampering and spoiling your loved one making them feel special. Wouldn't you yourself liked to be pampered and spoiled silly by someone? And if it is done everyday for you then would the emotions not become too mundane and you will soon start taking things for granted? 
Then why not have that one special day set aside to express your feelings?  And as for showing your love, you need not burn a big hole in your pocket by doing something really fancy and spending too much money. You can keep it simple by just spending some time together, cook his/hers favorite dish, go for a beautiful drive, see a favorite movie at home together, laugh together.....I think there are a million things you can have fun doing together. We were lucky as this year V Day was on a Saturday and everyone was home.To add to the charm, it was a beautiful sunny day, the perfect day to just laze out in the sun and that's just what all of us did!!
I think as we age we become too cynical and hard hearted and start being too judgmental about every small things(and that sadly includes me too).
Its about time to 'shake our sillies', loosen up a bit and start taking pleasure in small things surrounding us. Life is too short to start holding grudges, who knows what lies ahead in your next step. So move on ahead with a big smile and grab every opportunity you can to make beautiful memories in your life.
My Red Velvet Cake celebrates all the good things in life that I hold close to my heart and are more precious than anything in my life - my family and my friends. Cheers!! 
Ingredients
21/2 cup flour
1 cup vegetable oil
11/4 cup sugar
3 eggs
1 tsp vanilla extract
1 tbsp vinegar
2 tbsp red food color
1/2 cup cocoa
1/4 tsp salt
11/2 cup buttermilk
11/2 tsp baking soda
3 tbsp red liquid food color
1 tsp white vinegar
For the icing
8 ounces cream cheese, room temperature
8 tbsp(1 stick) unsalted butter,room temperature, cut into pieces
1 up confectioners' sugar
1 tbsp milk
For Decoration
Sliced strawberries (optional)
                                    
Method
Heat oven to 350 F. 
In a large bowl sift together the flour, sugar, baking soda, salt and cocoa powder.
In another bowl, whisk together the oil, buttermilk, eggs, food coloring, vinegar and vanilla.
Using a mixer, mix the dry ingredients into the wet ingredients until just combined and a smooth batter is formed.
Pour the mixture into a prepared pan.
Bake at 350 F for 35-40 minutes or until a wooden toothpick inserted in the center comes out clean.
Remove the cake from the oven and run a knife around the edges of the pan. Invert the cake onto a plate and re-invert it into a cooling tack, Let cool completely.
Place cream cheese in a mixing bowl. Whisk with a hand beater till it becomes soft and creamy. Gradually add butter and continue to beat till smooth and well blended, Sift in confectioners sugar and continue beating till smooth
Add vanilla essence stir to combine.
If the icing seems too thick, add more milk a little at a time until icing reaches desired consistency.
Once the cake is completely cooled, ice it with the cream cheese frosting. Decorate with sliced strawberries if desired. 
Now it is time to sit back, relax and enjoy the day with your loved ones!!

Tuesday, 24 June 2014

The perfect Genoise - Baking with Julia

Have you ever wondered what is the difference between a Sponge cake and a Genoise Cake?
Genoise Cake is an Italian cake named after its city of origin, Genoa. Belonging to the family of sponge cakes, it is a very light and airy cake which makes it a perfect candidate for making layer cakes, Gateaux with layers of mousse and whipped cream, sponge fingers and is also great for making Tiramisu.  It has a much drier and firmer texture than a classic sponge cake which  helps it to soak in the syrup better while retaining its shape. 
These layer cakes, common in the coffeehouses of Europe, are called "European- Style" to distinguish them from the American-style butter layer cakes, which generally have fewer, thicker layers.
 Both the Sponge Cake and Genoise Cake are light and airy and make a perfect base to make both simple and elaborate desserts.  While the technique for making a Genoise cake is quite similar to a sponge cake, the basic difference is that like in sponge cakes, the eggs are not separated but beaten whole. Other difference is that warm melted butter is added to the batter which lends the Genoise cake a lovely rich flavour while sponge cakes have no fat in the recipe.
To make a light and airy genoise, eggs and sugar are gently whisked over simmering water, which melts the sugar so that the eggs will reach their full volume when beaten. 
It is generally believed that getting a Genoise cake right is quite tricky but not with this recipe of Julia child's. This is not the first time I am baking a genoise sponge. I had earlier attempted a Fresh fruit Gateaux using Eric Lanlard's recipe.
What I found different about Julia Child's recipe and what really attracted me to it was that her version of genoise cake is one of the very few recipes which does not require any heating of the eggs making the process really simple. The recipe just calls for beating whole eggs and sugar together for a couple of minutes till the mixture is nice and fluffy and leaves a ribbon trail behind. I made the recipe exactly as stated, followed every little detail and the result was a beautiful soft and light cake. 
Topped with whipped cream and fresh fruits it was delicious - an ideal cake for summertime.

From the Cake Bible: "Genoise is a European sponge-type cake which differs from American sponge in that it contains butter to partially tenderize and flavor it and much less sugar. Even when syrup is added to flavor it, it's still less sweet then a sponge cake though a lot more moist. With a generous amount of syrup it's moist without being wet.
Recipe adapted from  Baking with Julia by Dorie Greenspan 

Ingredients
2 tablespoons unsalted butter, melted 
1 cup sifted cake flour 
1/2 cup sugar 
1/8 teaspoon salt 
4 large eggs, at room temperature 
1 teaspoon pure vanilla extract 

Method
Preheat oven to 170 C.
Pour the melted butter into a 1-quart bowl; reserve. 
Return the sifted flour to the sifter or sieve and add 1 tablespoon of the sugar and the salt; sift onto a piece of waxed paper and set aside. 
Put the eggs and the remaining sugar into the bowl of a heavy-duty mixer (or work with a hand-held mixer). 
Holding the whisk attachment from the mixer in your hand, beat the mixture to blend the ingredients. 
With the bowl and whisk attachment in place, whip the mixture on medium speed until it is airy, pale, and tripled in volume, like softly whipped cream, 4 to 5 minutes. 
You'll know that the eggs are properly whipped when you lift the whisk and the mixture falls back into the bowl in a ribbon that rests on the surface for about 10 seconds. 
If the ribbon immediately sinks into the mixture, continue whipping for a few more minutes. 
Pour in the vanilla extract during the last moments of whipping. 
Detach the bowl from the mixer. 
Sprinkle about one third of the sifted flour mixture over the batter. 
Fold in the flour with a rubber spatula, stopping as soon as the flour is incorporated. 
Fold in the rest of the flour in 2 more additions. 
Grease the bottom and sides of an 8-inch round cake pan with solid shortening, dust with flour, and tap out the excess. Fit the bottom with a parchment or waxed paper circle. 
Gently spoon about 1 cup of the batter into the bowl with the melted butter and fold the butter in with the rubber spatula. Fold this mixture into the batter in the mixer bowl. (This is the point at which the batter is at its most fragile, so fold gingerly.) 
Pour batter into a prepared pan, smooth with a spatula, and bake at 325F/170 C for 25-27 minutes. 
Cake is done when it rises and doubles, and springs back when you touch it and the cake starts to come away from the sides of the pan.
Transfer the cake to a rack and let it rest for 5 to 10 minutes. 
To remove the cake from the pan, first test its readiness: Tilt and rotate the pan, then gently tap it on the counter. If it doesn't seem as if the cake is releasing from the pan, or you are the cautious type, run a thin blade between the cake and the sides of the pan, freeing the sides and letting a little air get under the cake. 
Invert the cake onto a rack and remove the pan. Slowly peel off the paper liner, turn it over, and put it back on the cake. Cover the cake with another rack and invert again. 
Remove the top rack and let the cake cool completely right side up. 
The cake can remain uncovered at room temperature for a day, but it should be wrapped in plastic if you won't be using it within 2 days. For longer storage, wrap it well and freeze it for up to 10 days. Thaw, still wrapped, at room temperature  
                 

Tuesday, 6 May 2014

Red Velvet Doll Cake For My Daughter's 18th Birthday

To celebrate my daughters 18th birthday, I made a doll cake for her. She particularly wanted this cake as I had made a doll cake for her 1st birthday. So, making it again for her 18th birthday actually completes a whole circle, significant of bidding adieu to her childhood and taking her first steps into the adult world.
I chose to make a Red Velvet cake for her birthday. It is also because she is quite fond of it and being her special day I wanted her cake to be special too. I have made this cake earlier too but with oil. It was a beautiful cake - super moist, soft and melt-in-the-mouth delicious. If interested you can check out the recipe here. This time I decided to use a different recipe that used butter. I can't say I was entirely happy with it. It was soft and moist and quite tasty but if compared, it did not match up to the oil cake which was outstanding in both taste and texture. Even though I followed the recipe to the 'T', I was disappointed to see that the color of the cake was barely red, infact it looked like an ordinary chocolate cake. You can try both the recipes.
I frosted the cake with mascarpone cheese mixed with whipped cream as it is a little difficult finding Cream Cheese here in the market. Also because these two creams mixed together were great for piping the decorations on the doll. If you want to learn how to make mascarpone cheese at home,do read my Tiramisu post. My daughter loved the doll cake. She was also taken by surprise, because amidst a really busy weekend,(one entire day spent in some urgent hospital check-ups and the next day spent in chauffeuring  the birthday girl and her friends, who were over for a sleep-over to the mall), she didn't really expect me to come up with the cake, the look of surprise and happiness evident on her face when she found me decorating the cake. 
A labor of love indeed for my lovely one!!
Ingredients
21/2 cups all purpose flour
21/2 Tbsp cocoa powder
1 tsp salt
11/2 cups caster sugar
2 eggs
120 gms salted butter
11/2 tsp vanilla extract
1 cup buttermilk
1 tsp white vinegar
1 tsp baking soda
1 tsp baking powder
2 Tbsp red food coloring
For icing the cake
2 cups whipped cream
Method :- Preheat oven to 175 C. Sift the flour, salt and cocoa powder into a bowl and set aside. In an electric mixer cream the butter and sugar. Add the eggs one by one whilst the mixer is still on. Add the vanilla essence. In a measuring jug, whisk the buttermilk and food coloring until combined. In a mixer on low speed, alternately add the dry mixture and wet buttermilk until all is used up.Turn the mixer off. Combine the vinegar and baking soda in a cup and gently fold into the mixture with a spatula. Pour the cake mixture into a greased baking tin. Bake in the preheated oven for 30 - 35 minutes or until a skewer inserted into the center comes out clean. Allow to cool on wire racks. Once completely cool wrap it in a cling film and refrigerate for a few hours before doing the frosting.
For Frosting the cake- Whisk together the whipping cream and mascarpone cheese till smooth. I used a store bought whipped cream which was already sweetened. Incase you are whipping cream at home, add in the sugar according to taste and consistency. To decorate the doll cake, I took some tips from a video on You tube. You can check out the link here.
  

Tuesday, 25 February 2014

Chocolate Dream Cake

The most beautiful thing in this world is to see your parents smiling, and knowing that you are behind that smile. 

It is almost next to impossible to match all that your parents have done for you in their lifetime, but even a little something that can bring a smile to their faces makes the effort worth it.
It was my parents anniversary last month and and I had the opportunity to make their anniversary cake for them, a cake which I wanted to be really special. 
Any birthdays or anniversaries in our family and it has to be, without a doubt, a chocolate cake. So at least that part was decided. Searching for a good recipe for a chocolate cake I hit upon the 'Chocolate and Peanut butter Dream Cake' on The Novice Chef's blogDream Cake!! the very name of the cake sounded intriguing. I read through the recipe and found it different from any other chocolate cake recipe I had ever tried before and interesting enough to make me want to try it. 
I wasn't sure if mom and dad would be too keen on the peanut butter flavor so I decided to play it safe and do a simple whipped cream and chocolate ganache icing to decorate the cake.
I had finished the final chocolate ganache layer on the cake, when on an impulse I decided to make a chocolate lace border around the cake. How difficult could it be? I had seen Deeba from Passionate about baking use these beautiful delicate chocolate lace borders quite often for decorating her cakes and they looked absolutely stunning. I have been enticed with these borders since a long time and finally decided to take the plunge and try my hand at making them. 
I carefully read and followed the instructions on Deeba's blog and to my utter surprise found that the border was a breeze to make. It was so simple to make yet made a world of difference to the final look of the cake. The border added finesse and elegance to the cake, taking the cake to a whole new classy level.
I was mighty pleased with how my had cake turned out - a fitting tribute for my parent's anniversary and seeing the smile on my parents face on seeing the cake, I knew I had nailed it. 
And to add to my happiness the cake tasted as good as it looked. A perfect dream cake!!

Ingredients
For the Chocolate Cake:
2 cups all purpose flour
1/4 cup cocoa powder
2 teaspoons baking powder
2 teaspoons baking soda
1 teaspoon salt
2 cups water
2 cups sugar
140 gms dark chocolate, chopped
6 tablespoons unsalted butter
2 tablespoons vegetable oil
1 teaspoon vanilla extract
3 large eggs
For the Filling
2 cups whipped cream
1 cup chocolate ganache
1/2 cup dulce de leche (optional) -I had some leftover from the banoffee pie. Recipe here
To make the Chocolate Ganache
150 ml cream (I used Amul)
200 gms dark chocolate
For the Chocolate lace border
100 gms dark chocolate
Parchment paper
 Method
To make the cake
Preheat oven to 180 C.
Sieve together flour, cocoa powder, baking powder, baking soda and salt in a bowl.
In a medium sauce pan, combine water and sugar over medium heat. 
Bring to a boil and stir until sugar dissolves about 1 minute.
Remove from heat and add chocolate and butter, stirring occasionally, until melted.
Whisk in vegetable oil and vanilla extract.
Quickly beat in the eggs (do this quickly so that the eggs do not cook) into the chocolate mixture until combined.
Whisk in dry ingredients, until smooth.
Divide batter evenly between two pans and bake for 25 - 30 minutes, or until a toothpick inserted in the center comes out clean.
Let the cakes cool in the pans completely before frosting.
To Assemble the cake
Now that your cakes are baked and cooled completely it is time to assemble them.
First make the chocolate ganache. Place the cream and chocolate over medium heat and stir until the chocolate is melted. Take it off heat and whisk with a spoon till smooth and shiny. Keep aside. It will thicken as it cools.
Whisk  together the chocolate ganache with the dulce de leche till smooth and well mixed.
Now cover one half of the cake with a thick layer of the ganache mixture.
Spoon a generous dollop of whipped cream over the ganache and smoothen to cover completely.
Place the other cake layer on top of the cream and press gently to make it level. With a small spatula, spread the cake with 1 1/2 cups more of whipped cream and spread it to cover completely the top and sides of the cake. Don't worry about it being too smooth right now as it has to be covered with some more yumminess (drool!!). Freeze for 30 minutes.
Pour the warm chocolate ganache (heat it slightly if it has thickened) over the top of the chilled cake - allowing it to drizzle over the sides. With a spatula or a flat knife quickly run around the edges of the cake to give a smooth finish.
Let the glaze harden for 30 minutes. 
Decorate with piped swirls and serve. 
Or if you feel like being a little adventurous like me, make this chocolate lace border to place around your cake. Believe me it is amazingly simple and elevates your decorated cake to a whole new level.
To make the chocolate lace border : 
Cut the butter paper according to the height of the border you would like. 
For the circumference just measure around the baking tin you baked your cake in. 
Melt the chocolate for about 2 minutes in your microwave. 
Put the melted chocolate in a piping bag and make a spiral design (I made a random freehand squiggle. You can trace a design on the paper if you want something specific)
Wait for it to almost set (It will take less than a minute to set so you have to work quickly before it hardens). 
Then wrap it around the cake and press gently to the sides of the iced cake. 
Gently peel off the paper. 
And Voila!! You have a masterpiece on your hands.
My Parents by Brittany S. Wright 

You are both special in every way,
Encouraging me more & more each passing day.
You both are the reason why I'm so strong,

With you two a the helm not a thing could go wrong.

You've both helped me through many trials & tribulations,

You’ve made things better in every situation.

Thank you both for always being there,

And showing me that you truly care.

Words could never explain how I feel about you,

But I hope you know that I truly love you two!